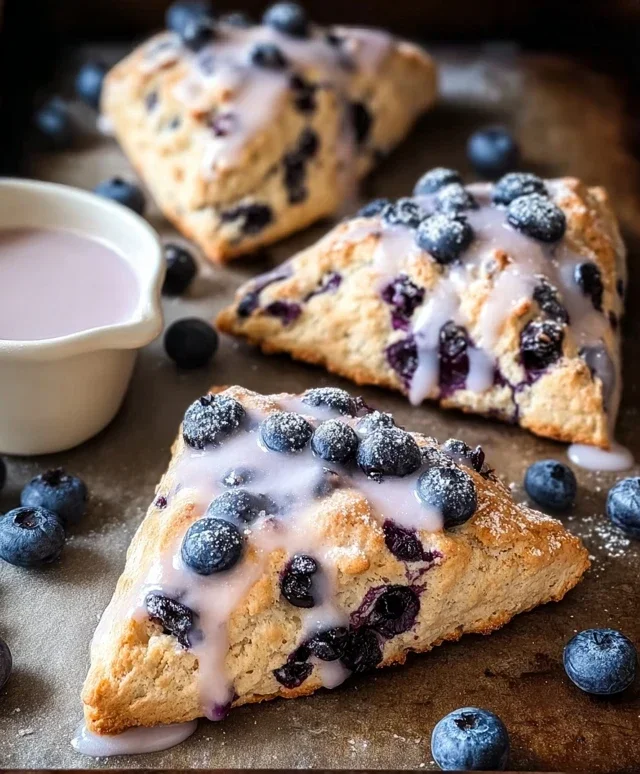
Heart-Shaped Cherry Cheese Danish Recipe
Heart-Shaped Cherry Cheese Danish beckons with its irresistible charm and delectable flavor, making it a beloved treat for any occasion, especially around Vnon-alcoholic alentine’s Day or as a sweet surprise for someone special. Imagin extracte a delicate, flaky pastry cradling a luscious, creamy cheese filling, all topped with a vibrant, slightly tart cherry compote. It’s this perfect symphony of textures and tastes that has cemented the Heart-Shaped Cherry Cheese Danish as a go-to dessert and breakfast indulgence. People adore it not just for its beauty – that iconic heart shape is undeniably appealing – but for the comforting, yet elegant, experience it offers. What truly sets this particular recipe apart is the masterful balance achieved between the rich, tangy cream cheese, the sweet burst of cherries, and the buttery layers of puff pastry. It’s a delightful escape, a little bite of happiness that feels both homemade and utterly sophisticated.

Ingredients:
- 4 oz cream cheese, softened
- ¼ cup sugar
- 1 egg yolk
- 1 tablespoon ricotta cheese
- ½ teaspoon almond extract or vanilla extract
- Pinch of salt
- ½ tablespoon lemon zest
- 2 sheets puff pastry (from a standard 1-box package)
- 1 can cherry pie filling
- 1 large egg
- 1 tablespoon water
- All-purpose flour, for dusting
Preparing the Cream Cheese Filling
Step 1: Combine Cream Cheese Base
In a medium-sized bowl, begin extract by combining the softened cream cheese and the ¼ cup of sugar. It’s crucial that the cream cheese is truly softened – left at room temperature for about 30-60 minutes. This ensures a smooth, lump-free filling. Use a whisk or an electric mixer on low speed to thoroughly cream these two ingredients together until they are light and fluffy. You want to incorporate as much air as possible at this stage, as it contributes to the delightful texture of the filling. Once they are well combined and no streaks of cream cheese remain, add the egg yolk. The egg yolk acts as a binder, adding richness and helping the filling set beautifully when baked. Mix it in until just incorporated, being careful not to overmix at this point.
Step 2: Enhance Flavor and Texture
Now, it’s time to add the remaining flavor and texture elements to our cream cheese mixture. Gently stir in the 1 tablespoon of ricotta cheese. Ricotta adds a subtle tang and an extra layer of creaminess that complements the cream cheese wonderfully. Next, add your chosen extract – either ½ teaspoon of almond extract or vanilla extract. Almond extract provides a slightly more complex, nutty flavor that pairs exceptionally well with cherries, while vanilla is a classic, universally loved choice. Decide based on your preference! Don’t forget a pinch of salt; salt is a secret weapon in baking, as it enhances all the other flavors and balances the sweetness. Finally, fold in the ½ tablespoon of lemon zest. The zest offers a bright, citrusy aroma and flavor that cuts through the richness of the cheese and complements the tartness of the cherries. Mix everything until just combined, ensuring the zest is evenly distributed throughout the filling. Set this delicious cream cheese mixture aside.
Assembling the Heart-Shaped Cherry Cheese Danish
Step 3: Prepare Puff Pastry and Shape
Unroll your puff pastry sheets onto a lightly floured surface. A little flour prevents sticking and allows for easy handling. If your puff pastry is frozen, ensure it’s thawed according to package directions, but still kept cold for optimal flakiness. We want to work with it while it’s pliable but not warm. Using a sharp knife or a pizza cutter, carefully cut each sheet of puff pastry into two equal squares. Then, from each square, cut out a heart shape. A simple way to do this is to fold the square in half horizontally, cut a curved line from the folded edge to the center to create the top curve of the heart, and then cut straight down from the top curve to the bottom corner for the point. Unfold to reveal your heart shapes. You should end up with four heart-shaped pieces of puff pastry. Place these heart shapes onto a baking sheet lined with parchment paper. This ensures easy cleanup and prevents sticking.
Step 4: Filling the Danish Bases
Take your prepared cream cheese filling and spoon about 1 to 2 tablespoons onto the center of each puff pastry heart. Leave a border of about ½ inch around the edges. This border is crucial for creating the structure of the danish and preventing the filling from oozing out during baking. Now, gently spoon the canned cherry pie filling over the cream cheese filling. Don’t overload the danishes, as this can also lead to spillage. Distribute it evenly, aiming for a good ratio of cream cheese to cherry filling. You want each bite to have a delightful combination of both.
Step 5: Sealing and Egg Wash for Golden Perfection
To create the classic danish appearance and seal in the fillings, we’ll carefully bring the edges of the puff pastry together. For each heart, gently bring two opposite points of the pastry towards the center, overlapping them slightly over the filling. Then, bring the remaining two points towards the center, overlapping them to form a more enclosed shape, allowing some of the filling to peek through. Pinch the overlapping edges gently to seal them. This creates that distinctive, rustic folded look. In a small bowl, whisk together the remaining large egg and the 1 tablespoon of water. This is your egg wash. Using a pastry brush, lightly brush the exposed pastry edges with the egg wash. This step is key to achieving a beautiful golden-brown, glossy finish on your danishes. It also helps the pastry achieve maximum flakiness.
Baking to Deliciousness
Step 6: Baking the Heart-Shaped Cherry Cheese Danish
Preheat your oven to 400°F (200°C). Once the oven is preheated, carefully place the baking sheet with your assembled danishes into the hot oven. Bake for approximately 18-22 minutes, or until the puff pastry is puffed up, golden brown, and beautifully crisp. The filling should be bubbly and heated through. Keep an eye on them during the last few minutes of baking, as puff pastry can brown quickly. If any areas are browning too fast, you can loosely tent them with aluminum foil.
Step 7: Cooling and Serving
Once baked to perfection, carefully remove the baking sheet from the oven. Allow the Heart-Shaped Cherry Cheese Danish to cool on the baking sheet for about 5-10 minutes before transferring them to a wire rack to cool further. This initial cooling period on the baking sheet helps them set properly. These danishes are best enjoyed slightly warm, allowing the creamy filling and fruity cherry topping to be at their most delightful. They are perfect for breakfast, brunch, or even a sweet afternoon treat.

Conclusion:
You’ve now learned how to create the delightful Heart-Shaped Cherry Cheese Danish! This recipe is a wonderful way to add a touch of homemade charm and deliciousness to any occasion, from a special breakfast in bed to a festive afternoon tea. The creamy cheesecake filling, bright cherry topping, and flaky pastry come together in perfect harmony, making these danishes a true treat. Don’t be intimidated by the steps; each part is manageable, and the result is absolutely worth the effort.
I encourage you to give the Heart-Shaped Cherry Cheese Danish a try. They are perfect served warm with a dusting of powdered sugar or a dollop of whipped cream. For variations, consider using different berries like raspberries or blueberries, or even a sprinkle of almond extract in the cheese filling for an extra layer of flavor. Experiment and make them your own!
Frequently Asked Questions:
Can I make the Heart-Shaped Cherry Cheese Danish ahead of time?
Yes, you can! You can prepare the cheese filling and cherry topping a day in advance and store them separately in the refrigerator. The pastry can also be prepared and chilled. Assemble and bake them closer to serving time for the freshest results.
What kind of cherries are best for the Heart-Shaped Cherry Cheese Danish?
Fresh or frozen cherries work beautifully. If using frozen, thaw them and drain off any excess liquid before adding them to the topping mixture. Canned cherry pie filling is also a convenient option, though it might result in a slightly sweeter and less tart flavor.
How do I get the perfect heart shape?
Using a heart-shaped cookie cutter on the puff pastry before filling is the easiest way to achieve a consistent heart shape. You can also freehand cut shapes if you’re feeling artistic, or gently press the pastry into a heart mold while it bakes.
Heart-Shaped Cherry Cheese Danish Recipe
Delicious heart-shaped danishes filled with a creamy cheese mixture and sweet cherry pie filling, baked in flaky puff pastry.
Ingredients
-
4 oz cream cheese, softened
-
1/4 cup sugar
-
1 egg yolk
-
1 tablespoon ricotta cheese
-
1/2 teaspoon almond extract or vanilla extract
-
Pinch of salt
-
1/2 tablespoon lemon zest
-
2 sheets puff pastry (from a standard 1-box package)
-
1 can cherry pie filling
-
1 large egg
-
1 tablespoon water
-
All-purpose flour, for dusting
Instructions
-
Step 1
Combine softened cream cheese and sugar until light and fluffy. Add egg yolk and mix until just incorporated. -
Step 2
Stir in ricotta cheese, almond or vanilla extract, salt, and lemon zest until just combined. -
Step 3
Unroll puff pastry, cut each sheet into two equal squares, then cut each square into a heart shape. Place hearts on a parchment-lined baking sheet. -
Step 4
Spoon cream cheese filling onto the center of each heart, leaving a border. Top with cherry pie filling. -
Step 5
Bring opposite points of the pastry towards the center, overlapping slightly to enclose the filling. Pinch edges to seal. Brush exposed pastry with egg wash made from 1 large egg and 1 tablespoon water. -
Step 6
Bake at 400°F (200°C) for 18-22 minutes, or until golden brown and puffed. -
Step 7
Let cool on the baking sheet for 5-10 minutes, then transfer to a wire rack to cool further. Serve warm.
Important Information
Nutrition Facts (Per Serving)
It is important to consider this information as approximate and not to use it as definitive health advice.
Allergy Information
Please check ingredients for potential allergens and consult a health professional if in doubt.