Easy Peanut Butter Rice Krispie Balls Treat
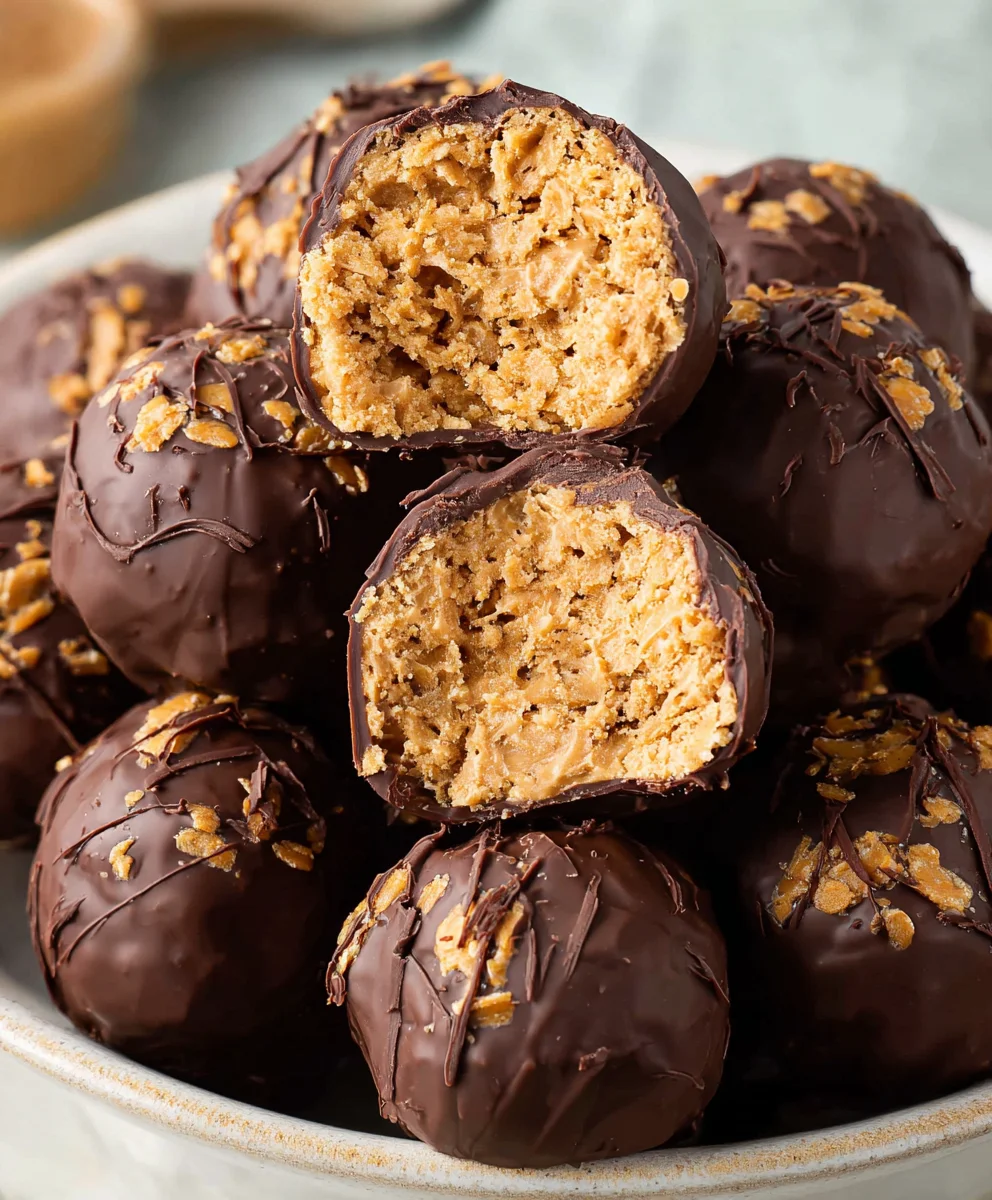
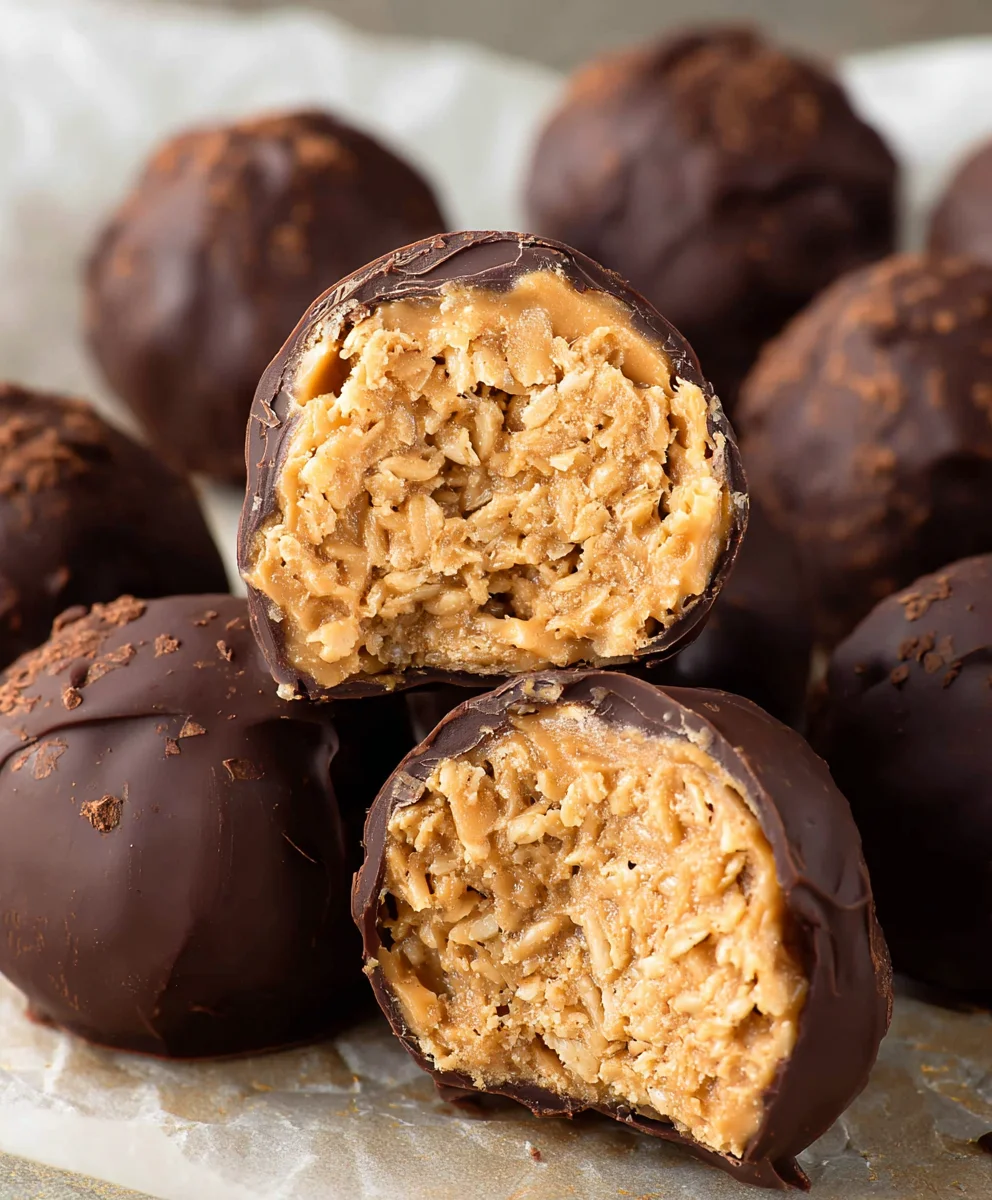
Peanut Butter Balls with Rice Krispies are an absolute delight, a timeless classic that never fails to bring a smile to faces of all ages. There’s something incredibly satisfying about the perfect harmony of creamy, salty peanut butter and the delightful crunch of puffed rice cereal, all coming together in a no-bake wonder. People love these treats because they are incredibly easy to make, requiring no oven time and minimal fuss, making them a perfect weekend project or a last-minute party pleaser. What truly makes Peanut Butter Balls with Rice Krispies so special is their irresistible texture combination – the chewy, gooey center from the peanut butter and binder, contrasted with the light, airy crispness of the Rice Krispies. They’re the ultimate comfort food, a nostalgic bite that transports you back to simpler times, all while offering a wonderfully satisfying snacking experience that’s hard to resist.
Ingredients:
- 1 cup creamy no-stir peanut butter
- 3 tablespoons salted butter, melted
- 1 cup powdered sugar
- 2 ½ cups Rice Krispies cereal
- 12 oz semi-sweet chocolate chips (or chocolate melting wafers)
Making the Peanut Butter Base
First, we’ll get our delicious peanut butter mixture ready. In a medium-sized mixing bowl, add the 1 cup of creamy no-stir peanut butter. The “no-stir” variety is great here because it tends to be a bit firmer and holds its shape better when rolled. Next, pour in the 3 tablespoons of salted butter that you’ve melted. You can melt your butter in the microwave in 15-second intervals, stirring in between, until it’s completely liquid. Don’t overheat it, just warm enough to melt. Now, add the 1 cup of powdered sugar to the bowl. This is where the magic starts to happen. You’ll want to combine these ingredients thoroughly. I find a sturdy spoon or a rubber spatula works best for this stage. You’re looking for a smooth, well-combined mixture that’s easy to handle. It might seem a little sticky at first, but keep mixing until all the powdered sugar is incorporated into the peanut butter and melted butter. This base is what will give our Peanut Butter Balls with Rice Krispies their delightful chew and rich flavor.
Incorporating the Crispy Crunch
Once you have your smooth peanut butter base, it’s time to add that signature crunch! Gently fold in the 2 ½ cups of Rice Krispies cereal into the peanut butter mixture. The key here is to be gentle. You don’t want to crush the cereal too much, as we want to retain that satisfying crispiness in every bite. Use your spatula or spoon to carefully coat each piece of cereal with the peanut butter mixture. Make sure the cereal is evenly distributed throughout the bowl. This process might take a minute or two, and you might need to use your hands towards the end to ensure every single Rice Krispy is coated in that delicious peanut butter goodness. Don’t worry if it feels a little crum extractbly; as long as most of the cereal is coated, it will come together when you start rolling.
Shaping the Peanut Butter Balls
Now comes the fun part: shaping our Peanut Butter Balls with Rice Krispies! Take small portions of the mixture – about a tablespoon at a time – and roll them between your palms to form balls. Aim for a uniform size so that they all cook (or set, in this case) evenly and look cohesive. If the mixture is sticking to your hands, you can lightly dampen your hands with water or a tiny bit of oil, but try to avoid adding too much. You can also dust your hands lightly with a bit of extra powdered sugar if needed. Place the rolled balls onto a baking sheet lined with parchment paper. This will prevent them from sticking and make them easier to handle later. Continue this process until all of your mixture has been rolled into balls. You should end up with a good number of these delightful treats!
Melting the Chocolate for Coating
The final touch for our Peanut Butter Balls with Rice Krispies is a luscious chocolate coating. You have two options here: semi-sweet chocolate chips or chocolate melting wafers. Both work wonderfully, but melting wafers tend to set up a little firmer. Place your 12 oz of semi-sweet chocolate chips or melting wafers into a microwave-safe bowl. Microwave in 30-second intervals, stirring thoroughly after each interval, until the chocolate is smooth and completely melted. Be patient, as you don’t want to scorch the chocolate. Alternatively, you can melt the chocolate using a double boiler method. Fill a saucepan with a couple of inches of water and bring it to a gentle simmer. Place a heatproof bowl over the saucepan, ensuring the bottom of the bowl doesn’t touch the water. Add your chocolate to the bowl and stir continuously until it melts smoothly. Once melted, remove the bowl from the heat and give it a final stir.
Coating and Setting the Peanut Butter Balls
This is where our Peanut Butter Balls with Rice Krispies get their beautiful finish. Now that your chocolate is melted and smooth, it’s time to coat the peanut butter balls. You can do this one of two ways: either dip each ball directly into the melted chocolate, ensuring it’s fully covered, or drizzle the chocolate over the balls. For dipping, use a fork or a toothpick to gently submerge each ball into the chocolate. Let any excess chocolate drip back into the bowl before placing it back onto the parchment-lined baking sheet. If you prefer drizzling, you can put the melted chocolate into a piping bag or a ziplock bag with a corner snipped off, and then artfully drizzle it over the balls. Once all the balls are coated, place the baking sheet into the refrigerator for at least 30 minutes, or until the chocolate has completely set. This chilling time is crucial for the chocolate to harden and create that perfect shell around our peanut butter and Rice Krispy centers.
Conclusion:
And there you have it – the ultimate guide to making delicious and incredibly easy Peanut Butter Balls with Rice Krispies! This recipe is a guaranteed crowd-pleaser, perfect for birthdays, holidays, or just a sweet treat to brighten your day. We’ve covered everything from the simple steps to ensure perfect texture and flavor, to creative ways you can adapt this classic. These no-bake wonders are not only fun to make but also a fantastic activity to do with kids, allowing them to get hands-on in the kitchen. Remember, the beauty of Peanut Butter Balls with Rice Krispies lies in its adaptability, so feel free to experiment!
For serving, these are fantastic on their own, but they also pair wonderfully with a glass of cold milk, a cup of coffee, or as a delightful addition to a dessert platter. Don’t be afraid to get creative with variations! You could add a swirl of chocolate on top, sprinkle them with sea salt, or even mix in a tablespoon of cocoa powder for a chocolate peanut butter version. The possibilities are truly endless. So gather your ingredients, have some fun, and enjoy the delightful taste of your homemade Peanut Butter Balls with Rice Krispies!
Frequently Asked Questions:
Can I make these Peanut Butter Balls with Rice Krispies vegan?
Absolutely! To make these vegan, simply substitute the butter with a vegan butter alternative and use a dairy-free chocolate for melting if you choose to dip them. Ensure your chocolate chips or melting chocolate are certified vegan.
How should I store Peanut Butter Balls with Rice Krispies?
Store your Peanut Butter Balls with Rice Krispies in an airtight container at room temperature for up to a week, or in the refrigerator for longer storage. They tend to firm up slightly in the fridge, which some people prefer!
My mixture seems too sticky. What can I do?
If your mixture is too sticky, you can try adding a little more Rice Krispies cereal, a tablespoon at a time, until it reaches a more manageable consistency. Alternatively, chilling the mixture in the refrigerator for about 15-20 minutes can also help make it easier to handle and roll into balls.
Easy Peanut Butter Rice Krispie Balls Treat
Delicious and easy-to-make no-bake treats combining chewy peanut butter, crispy Rice Krispies, and a smooth chocolate coating.
Ingredients
-
1 cup creamy no-stir peanut butter
-
3 tablespoons salted butter, melted
-
1 cup powdered sugar
-
2 ½ cups Rice Krispies cereal
-
12 oz semi-sweet chocolate chips
Instructions
-
Step 1
In a medium bowl, combine peanut butter, melted butter, and powdered sugar. Mix until smooth and well-combined. -
Step 2
Gently fold in the Rice Krispies cereal, ensuring each piece is coated with the peanut butter mixture without crushing the cereal. -
Step 3
Roll tablespoon-sized portions of the mixture into balls and place them on a parchment-lined baking sheet. -
Step 4
Melt the chocolate chips in a microwave-safe bowl in 30-second intervals, stirring until smooth. -
Step 5
Dip each peanut butter ball into the melted chocolate, allowing excess to drip off, or drizzle chocolate over the balls. Return to the parchment-lined baking sheet. -
Step 6
Refrigerate the coated balls for at least 30 minutes, or until the chocolate has completely set.
Important Information
Nutrition Facts (Per Serving)
It is important to consider this information as approximate and not to use it as definitive health advice.
Allergy Information
Please check ingredients for potential allergens and consult a health professional if in doubt.