Super Easy Mini Cheesecakes Vanilla Wafer Crust
Super Easy Mini Cheesecakes with Vanilla Wafer Crust are about to become your new best friend in the kitchen. Are you craving that creamy, dreamy cheesecake goodness without the usual fuss and intimidation? Then you’ve come to the right place! These delightful little desserts capture all the rich, decadent flavor of a full-sized cheesecake but in a perfectly portioned, utterly irresistible package. What makes these so special, you ask? It’s the magic of the simple yet sensational vanilla wafer crust, providing a delightful crum extractbly contrast to the smooth, velvety filling. They’re incredibly versatile, perfect for a quick weeknight treat, impressive enough for a dinner party, or just because you deserve something sweet. Get ready to experience pure joy, one delicious Super Easy Mini Cheesecake with Vanilla Wafer Crust at a time.
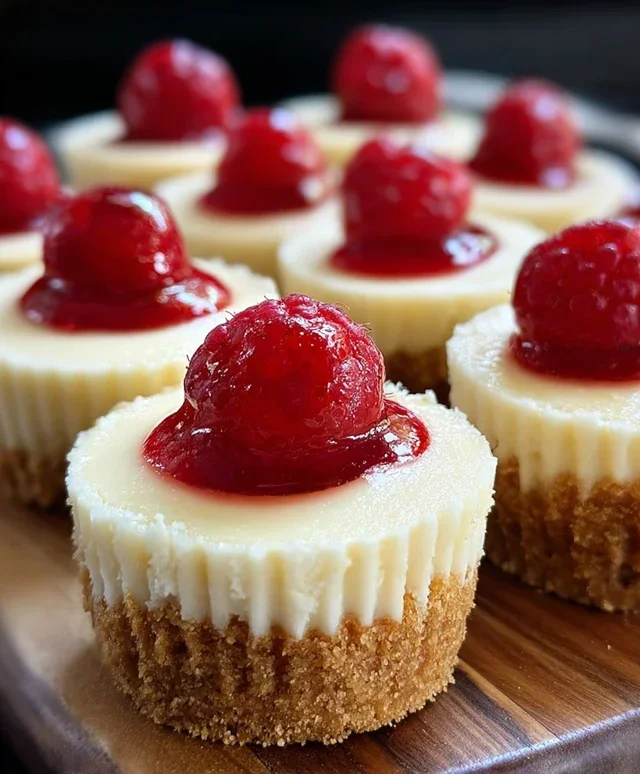
Super Easy Mini Cheesecakes with Vanilla Wafer Crust
Sometimes, you just crave that creamy, dreamy goodness of cheesecake, but the thought of making a whole one can feel… daunting. Fear not, my friends! I’m here to share my secret weapon for instant cheesecake gratification: these super easy mini cheesecakes with a perfect vanilla wafer crust. They’re incredibly simple to whip up, require no special techniques, and are guaranteed to disappear faster than you can say “more, please!” The best part? They use just a few simple, real ingredients that you likely already have in your pantry and fridge. Let’s get baking (or rather, assembling!).
Ingredients:
Crafting the Perfect Vanilla Wafer Crust
The foundation of any great cheesecake is its crust, and for these mini delights, we’re keeping it incredibly simple yet delicious with vanilla wafers. To start, let’s prepare our crust. Gather those 15 vanilla wafer cookies. You want to get them nice and finely crushed. The easiest way to do this is to place them in a resealable plastic bag and then use a rolling pin or the bottom of a heavy pan to gently crush them into fine crum extractbs. Alternatively, you can pulse them in a food processor until you have a fine, sand-like texture. Precision isn’t key here, but a good crum extractb is what we’re aiming for.
Once your vanilla wafers are crushed, it’s time to transform them into a pressable crust. In a small bowl, combine the vanilla wafer crum extractbs with about 1 to 2 tablespoons of melted butter. The amount of butter might vary slightly depending on how dry your crum extractbs are. You want the mixture to hold together when you squeeze a bit of it in your hand, almost like wet sand. This buttery mixture is what will hold your crusts together and give them that satisfying crunch.
Now, we’ll prepare our muffin tin. This recipe is perfect for making multiple mini cheesecakes at once. Line a standard muffin tin with paper liners. This will make removing your finished cheesecakes a breeze and also prevent any sticking. Spoon about 1 tablespoon of the buttery vanilla wafer mixture into the bottom of each muffin liner. Using the back of your spoon or a small tamper, press the crum extractbs down firmly to create an even layer. This compact crust will give your mini cheesecakes structure and prevent them from crum extractbling apart when you lift them. Make sure to press firmly so that it doesn’t fall apart later.
Whipping Up the Creamy Cheesecake Filling
With our crusts ready, let’s move on to the star of the show: the luscious cheesecake filling. In a large mixing bowl, add your 16 ounces of full-fat cream cheese. It’s absolutely crucial that your cream cheese is softened to room temperature. This ensures a smooth, lump-free batter. If it’s cold, it will be lumpy and difficult to incorporate evenly. You can soften cream cheese by leaving it out on the counter for about an hour, or by very carefully microwaving it in short bursts (10-15 seconds at a time), stirring in between, until just softened.
To the softened cream cheese, add your ¾ cup of granulated sugar. Now, using an electric mixer (a hand mixer or a stand mixer with a paddle attachment works perfectly), beat the cream cheese and sugar together until the mixture is light, fluffy, and completely smooth. Scrape down the sides of the bowl periodically to ensure everything is incorporated. You don’t want any pockets of unincorporated sugar or cream cheese.
Next, it’s time to add the eggs. Ensure your 2 large eggs are also at room temperature. This helps them emulsify better into the batter, creating a richer, creamier texture. Add the eggs one at a time, beating well after each addition until just combined. Overmixing at this stage can incorporate too much air, which can lead to cracking in your cheesecakes. Once the eggs are incorporated, gently stir in 1 teaspoon of vanilla bean paste or vanilla extract. The vanilla bean paste will give you lovely little flecks of vanilla and a more intense flavor, but good quality vanilla extract is perfectly acceptable as well. Mix until just combined.
Assembling and Baking Your Mini Masterpieces
Now comes the fun part: assembling our mini cheesecakes. Carefully spoon the cheesecake filling evenly over the prepared vanilla wafer crusts in each muffin liner. Fill them about two-thirds of the way full. You don’t want to overfill them, as they will puff up slightly as they bake. A tablespoon or small cookie scoop is great for this, ensuring consistent portioning.
Once your muffin tin is filled with the cheesecake batter, it’s time to bake. Preheat your oven to 325°F (160°C). Baking at a slightly lower temperature helps prevent the cheesecakes from overcooking and cracking. Place the filled muffin tin in the preheated oven. Bake for approximately 20-25 minutes, or until the edges of the cheesecakes are set and the centers are still slightly wobbly. They will continue to set as they cool. Don’t overbake them; a little wobble is a good sign of a creamy interior.
Cooling and Garnishing for the Grand Finnon-alcoholic ale
After baking, remove the cheesecakes from the oven. Let them cool in the muffin tin on a wire rack for about 10-15 minutes. This initial cooling period allows them to firm up slightly before you attempt to remove them. Once they’ve cooled a bit, carefully lift each mini cheesecake out of the muffin tin using the paper liners. Place them on the wire rack to cool completely. It’s important to let them cool down to room temperature thoroughly before refrigerating.
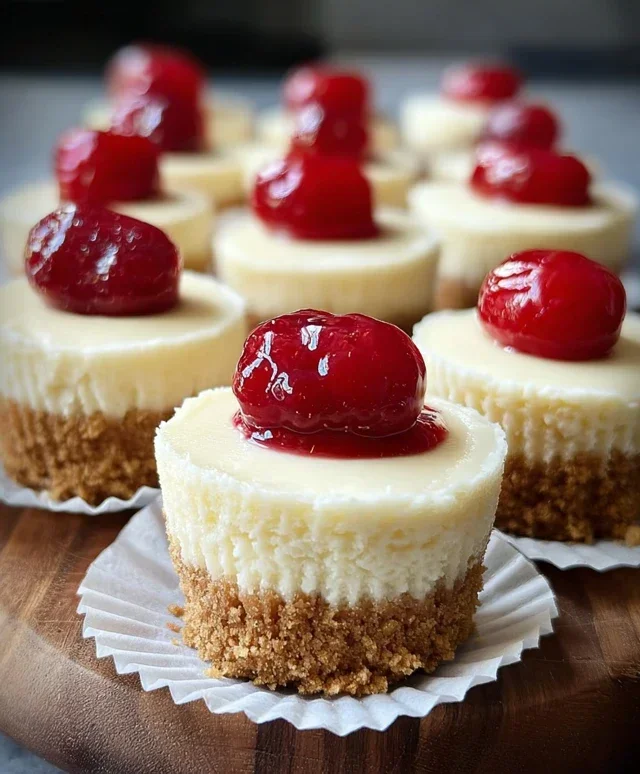
Once your mini cheesecakes are completely cool, it’s time for the crowning glory: the cherry pie filling. Spoon a generous dollop of the canned cherry pie filling onto the top of each cooled mini cheesecake. The vibrant red of the cherries against the creamy white of the cheesecake is a classic and beautiful presentation. You can also add a small dollop of whipped cream if you’re feeling fancy. Chill the cheesecakes in the refrigerator for at least 2 hours, or until fully set and chilled. This chilling time is essential for achieving that perfect cheesecake texture. Enjoy these delightful, easy-to-make treats!
Conclusion:
There you have it – a ridiculously simple yet incredibly satisfying recipe for Super Easy Mini Cheesecakes with Vanilla Wafer Crust! What makes this recipe truly stand out is its foolproof nature. You don’t need any fancy equipment or complicated techniques to achieve that perfect creamy texture and delightful crum extractbly base. These mini cheesecakes are a guaranteed crowd-pleaser, perfect for parties, potlucks, or just a special treat for yourself. They’re a fantastic base for all sorts of toppings – think fresh berries, a drizzle of chocolate sauce, a dollop of whipped cream, or even a sprinkle of caramel. Don’t be afraid to get creative! You can also experiment with adding a touch of lemon zest to the filling for a brighter flavor or using different cookie crum extractbs for the crust, like grabeef ham crackers or even shortbread. I truly encourage you to give these Super Easy Mini Cheesecakes a try; you’ll be amazed at how easy it is to create something so delicious!
Frequently Asked Questions:
Can I make these ahead of time?
Absolutely! These mini cheesecakes are perfect for making ahead. You can store them in an airtight container in the refrigerator for up to 2-3 days. It’s best to add toppings just before serving to prevent them from getting soggy.
What if I don’t have a muffin tin?
No muffin tin? No problem! You can adapt this recipe to use mini tart pans or even small ramekins. Just be sure to adjust the baking time slightly, as the cooking surface area can affect how quickly they set.
How can I prevent my cheesecakes from cracking?
For mini cheesecakes, cracking is generally less of an issue than with larger ones. However, avoiding over-mixing the batter and not over-baking are key. Baking them until the edges are set and the center is just slightly jiggly should result in beautiful, smooth tops every time.
Super Easy Mini Cheesecakes with Vanilla Wafer Crust
Effortless mini cheesecakes featuring a simple vanilla wafer crust and creamy filling, topped with sweet cherry pie filling.
Ingredients
-
15 vanilla wafer cookies
-
16 ounces full-fat cream cheese, softened
-
¾ cup granulated sugar
-
2 large eggs, at room temperature
-
1 teaspoon vanilla bean paste or vanilla extract
-
1 can cherry pie filling
Instructions
-
Step 1
Preheat oven to 350°F (175°C). Line a 12-cup muffin tin with paper liners or grease well. -
Step 2
Crush vanilla wafer cookies into fine crumbs. Press about 1 tablespoon of crumbs into the bottom of each muffin liner to form the crust. -
Step 3
In a large bowl, beat softened cream cheese and granulated sugar until smooth and well combined. -
Step 4
Beat in the large eggs one at a time until just incorporated. Stir in the vanilla bean paste or vanilla extract. -
Step 5
Spoon the cream cheese mixture evenly over the vanilla wafer crusts in the muffin tin, filling each about two-thirds full. -
Step 6
Bake for 18-20 minutes, or until the edges are set and the centers are slightly jiggly. -
Step 7
Let the cheesecakes cool in the muffin tin for 10 minutes, then transfer them to a wire rack to cool completely. -
Step 8
Once cooled, top each mini cheesecake with a spoonful of cherry pie filling before serving.
Important Information
Nutrition Facts (Per Serving)
It is important to consider this information as approximate and not to use it as definitive health advice.
Allergy Information
Please check ingredients for potential allergens and consult a health professional if in doubt.