Blueberry Lemon Sourdough Bread-Sweet Tangy Delight
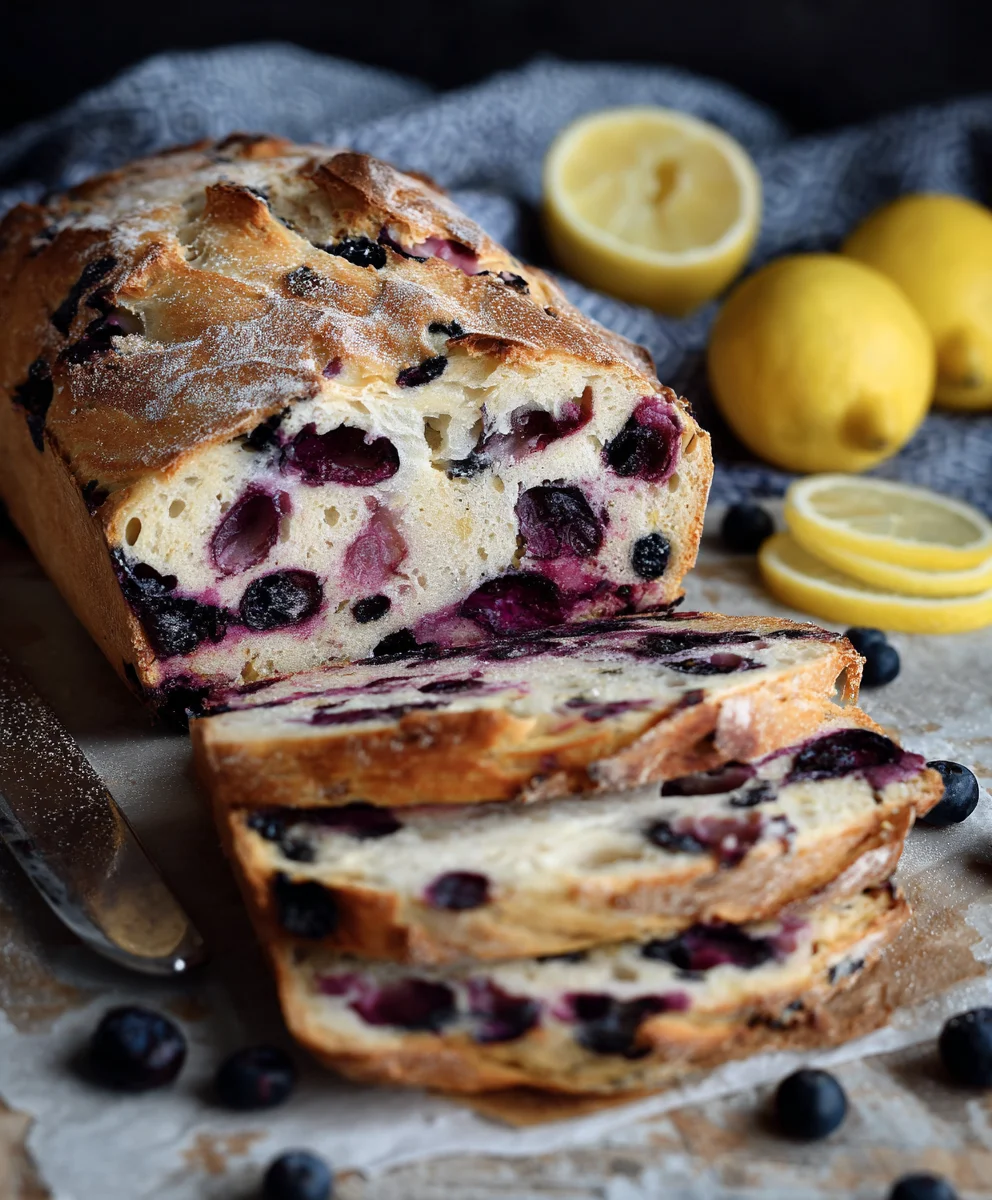
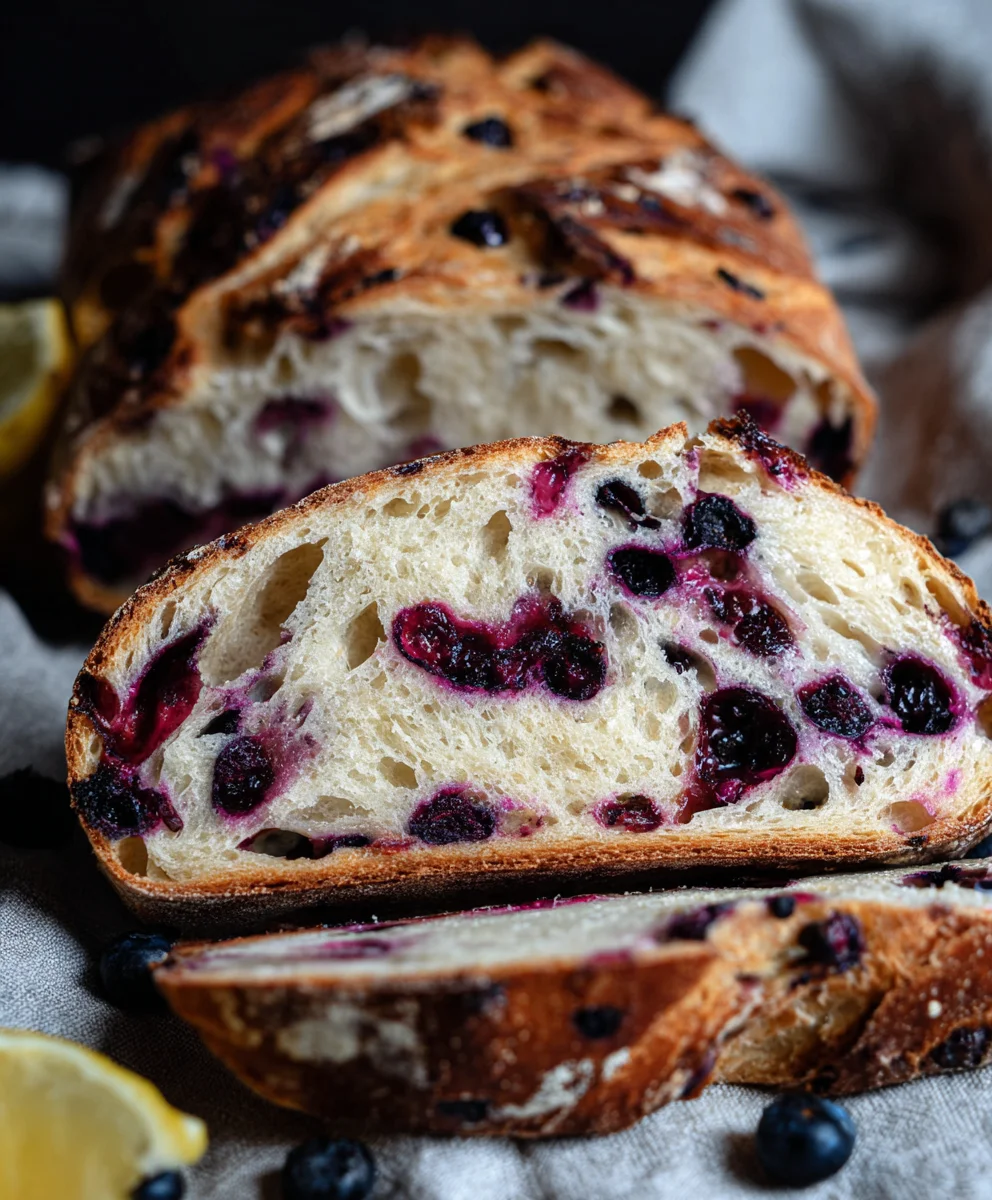
Blueberry Lemon Sourdough Bread, oh, how I adore you! There’s a magic that happens when the tangy complexity of sourdough meets the bright, zesty burst of lemon and the sweet, juicy pop of fresh blueberries. It’s a flavor combination that feels both comforting and surprisingly sophisticated, making it an absolute showstopper for brunch, a delightful afternoon treat, or even a unique dessert. People are drawn to this bread for its incredible texture – that signature chewy, airy crum extractb with a satisfyingly crisp crust that only true sourdough can deliver. What truly sets this Blueberry Lemon Sourdough Bread apart is the harmonious dance of its components. The sourdough starter provides a depth of flavor and a beautiful rise, while the lemon zest infuses every bite with a sunny, invigorating aroma. And of course, the blueberries! They become little pockets of sweet, jammy goodness that melt into the dough as it bakes, creating stunning visual appeal and an explosion of fruity delight. This isn’t just bread; it’s an experience, a celebration of simple, incredible ingredients coming together in perfect harmony. Get ready to fall in love with this Blueberry Lemon Sourdough Bread.”
Ingredients:
- 3 cups bread flour
- 1⅓ cups lukewarm water
- ¾ cup active, bubbly, and well-fed sourdough starter
- 3 tablespoons white sugar
- 1 teaspoon salt
- 1¼ cup fresh blueberries
- 1 tablespoon lemon zest
Preparing Your Dough
Step 1: Autolyse and Starter Integration
Begin extract by combining the bread flour and lukewarm water in a large mixing bowl. Use your hands or a sturdy spoon to mix until just combined, ensuring there are no dry pockets of flour. This initial hydration step, often called an autolyse, helgin extractto begin gluten development without intense kneading. Cover the bowl with a damp kitchen towel or plastic wrap and let it rest for 30 minutes. This resting period allows the flour to fully absorb the water, making the dough more pliable and easier to work with. After the autolyse, add your active, bubbly sourdough starter to the bowl. It’s crucial that your starter is active for this recipe to work; you’ll know it’s ready when it has doubled in size and is full of tiny bubbles. Gently incorporate the starter into the dough, stretching and folding it to distribute it evenly. You don’t need to knead aggressively at this stage. Once the starter is mostly incorporated, cover the bowl again and let it rest for another 30 minutes.
Step 2: Incorporating Salt, Sugar, and Zest
Now it’s time to add the flavor enhancers and structure builders. Sprinkle the salt and white sugar evenly over the dough. Add the fresh lemon zest, which will infuse a bright, citrusy aroma and flavor throughout your Blueberry Lemon Sourdough Bread. Gently fold these ingredients into the dough, again using a stretch-and-fold technique. Work the dough gently, trying to incorporate everything without tearing it too much. The salt will help to strengthen the gluten network, while the sugar will provide a touch of sweetness and aid in browning. The lemon zest, freshly grated, offers a vibrant counterpoint to the tang of the sourdough and the sweetness of the blueberries. Cover the bowl once more and let the dough rest for another 30 minutes. This resting period allows the ingredients to further integrate and the gluten to continue developing.
Developing the Dough and Adding Flavor
Step 3: Developing Gluten Through Stretch and Folds
This is where we build the strength and elasticity of our Blueberry Lemon Sourdough Bread. Over the next 2 to 3 hours, you will perform a series of stretch-and-fold maneuvers. Aim to complete 4 to 6 sets of these folds, with a 30-minute rest period between each set. To perform a stretch and fold, wet your hands slightly to prevent sticking. Reach under one side of the dough in the bowl, gently stretch it upwards, and then fold it over onto itself. Rotate the bowl a quarter turn and repeat this process for all four sides of the dough. You’ll notice the dough becoming smoother, stronger, and more cohesive with each set of folds. The dough should start to pull away from the sides of the bowl and develop a smooth, slightly taut surface. Don’t be discouraged if the dough feels a bit sticky initially; the gluten development will manage this.
Step 4: Incorporating the Blueberries
Once your dough has developed sufficient strength from the stretch and folds, it’s time to introduce the star of the show: the blueberries. Gently fold in the fresh blueberries. It’s important to be delicate here to avoid crushing the berries too much, as this can lead to the dough turning an undesirable purple hue and can release too much moisture. You can gently press the blueberries into the surface of the dough and then perform one or two final, very gentle stretch-and-folds to distribute them as evenly as possible. This last incorporation step is crucial for ensuring that the blueberries are well-distributed throughout the loaf, providing bursts of sweet, tart flavor in every slice of your Blueberry Lemon Sourdough Bread. After incorporating the blueberries, cover the dough and let it rest for another 30 minutes before proceeding to shaping.
Shaping and Baking for the Perfect Loaf
Step 5: Shaping and Final Proof
After the final rest with the blueberries incorporated, it’s time to shape your loaf. Gently turn the dough out onto a lightly floured surface. Be mindful not to degas the dough too aggressively. Shape it into your desired form – either a round boule or an oblong batard. To shape a boule, gently pull the edges of the dough towards the center, creating tension on the surface, and then cup your hands around the dough, rotating it to create a taut skin. For a batard, gently flatten the dough into a rough rectangle, then fold the top third down and the bottom third up, like a letter. Then, tightly roll the dough from the top seam downwards, sealing the edges. Place the shaped dough seam-side up into a proofing basket (banneton) that has been well-floured with rice flour or bread flour to prevent sticking. Cover the proofing basket loosely with plastic wrap or a damp cloth and place it in the refrigerator for a cold proof overnight, or for at least 8-12 hours. This cold proof allows the flavors to deepen and makes the dough easier to score.
Step 6: Baking to Golden Perfection
The next morning, preheat your oven to 475°F (245°C) with a Dutch oven or baking stone inside. If using a Dutch oven, preheat it for at least 30 minutes to ensure it’s screaming hot. Carefully remove the dough from the refrigerator and gently invert it onto a piece of parchment paper or directly into your preheated Dutch oven. If you’re using a Dutch oven, score the top of the loaf with a sharp razor blade or bread lame to allow for expansion. A simple cross or a few diagonal slashes will suffice. Place the lid on the Dutch oven and bake for 20 minutes. After 20 minutes, carefully remove the lid. This will allow the crust to develop its signature golden-brown color and a delightful crispness. Reduce the oven temperature to 450°F (230°C) and continue to bake for another 20-25 minutes, or until the crust is a deep golden brown and the internal temperature of the bread reaches at least 205°F (96°C). The aroma of baked blueberries and lemon will fill your kitchen.
Step 7: Cooling for Optimal Texture
Once baked to perfection, carefully remove your Blueberry Lemon Sourdough Bread from the oven and transfer it to a wire cooling rack. It is incredibly tempting to slice into this warm, fragrant loaf immediately, but resist the urge! Allowing the bread to cool completely is a crucial step for achieving the best texture. As the bread cools, the internal structure of the crum extractb continues to set, and any excess moisture evaporates. Slicing too early can result in a gummy, underdevrum extractped crumb. Aim for at least 2-3 hours of cooling time before slicing. You’ll know it’s ready when the crust has slightly softened from its initial crispness and the bread feels lighter. This patience will be rewarded with a berum extractifully airy crumb, a tangy sourdough bite, bursts of sweet blueberry, and a hint of bright lemon in every slice of your homemade Blueberry Lemon Sourdough Bread.
Conclusion:
And there you have it – the delightful journey of creating your very own Blueberry Lemon Sourdough Bread! This recipe has hopefully inspired you to embrace the slightly tangy, wonderfully chewy, and bursting-with-flavor possibilities of sourdough. The combination of sweet blueberries and zesty lemon creates a truly harmonious taste that is perfect for any occasion. Whether you’re a seasoned sourdough baker or just starting out, this Blueberry Lemon Sourdough Bread is an achievable and incredibly rewarding bake.
This beautiful loaf is fantastic served warm with a generous smear of butter, or perhaps a dollop of cream cheese. It also makes for a wonderful base for French toast or even served alongside a fresh fruit salad. Don’t be afraid to experiment with variations! Consider adding a touch of lavender for an extra floral note, or swapping out some of the blueberries for raspberries. The key is to have fun and make this Blueberry Lemon Sourdough Bread your own!
FAQs
Can I use frozen blueberries instead of fresh?
Absolutely! If you’re using frozen blueberries, it’s best to toss them with a tablespoon of flour before adding them to the dough. This helps prevent them from bleeding too much color into the crum extractb and keeps them from sinking to the bottom. You might also want to allow them to thaw slightly before incorporating them.
My sourdough starter isn’t very active. Will this recipe still work?
A strong and active sourdough starter is key to a good sourdough rise. If your starter is sluggish, I recommend feeding it regularly for a few days until it consistently doubles in size within a few hours of feeding. This will give your Blueberry Lemon Sourdough Bread the best chance of a beautiful oven spring and a light, airy texture.
How long can I store the Blueberry Lemon Sourdough Bread?
Once completely cooled, the Blueberry Lemon Sourdough Bread will stay fresh at room temperature for about 2-3 days, ideally wrapped in a linen bread bag or parchment paper. For longer storage, you can slice it and freeze it for up to a month. Simply toast slices from frozen as needed!
Blueberry Lemon Sourdough Bread-Sweet Tangy Delight
A delightful sourdough bread bursting with the sweet tang of blueberries and bright lemon zest.
Ingredients
-
3 cups bread flour
-
1⅓ cups lukewarm water
-
¾ cup active, bubbly, and well-fed sourdough starter
-
3 tablespoons white sugar
-
1 teaspoon salt
-
1¼ cup fresh blueberries
-
1 tablespoon lemon zest
Instructions
-
Step 1
Combine bread flour and lukewarm water in a large bowl. Mix until just combined. Cover and let rest for 30 minutes. Add active sourdough starter and gently incorporate. Cover and rest for another 30 minutes. -
Step 2
Sprinkle salt, white sugar, and lemon zest over the dough. Gently fold these ingredients into the dough using a stretch-and-fold technique. Cover and rest for another 30 minutes. -
Step 3
Perform 4 to 6 sets of stretch-and-folds over 2 to 3 hours, with 30-minute rests between each set, until the dough becomes smoother and stronger. -
Step 4
Gently fold in the fresh blueberries, being careful not to crush them. Perform one or two final, very gentle stretch-and-folds to distribute them. Cover and rest for 30 minutes. -
Step 5
Gently turn the dough onto a lightly floured surface and shape into a boule or batard. Place seam-side up into a well-floured proofing basket. Cover loosely and refrigerate for a cold proof overnight (at least 8-12 hours). -
Step 6
Preheat oven to 475°F (245°C) with a Dutch oven or baking stone inside. Carefully invert the dough onto parchment paper or into the preheated Dutch oven. Score the top and bake covered for 20 minutes. Remove lid, reduce oven temperature to 450°F (230°C), and bake for another 20-25 minutes until deep golden brown and internal temperature reaches at least 205°F (96°C). -
Step 7
Remove from oven and transfer to a wire cooling rack. Allow to cool completely for at least 2-3 hours before slicing to achieve optimal texture.
Important Information
Nutrition Facts (Per Serving)
It is important to consider this information as approximate and not to use it as definitive health advice.
Allergy Information
Please check ingredients for potential allergens and consult a health professional if in doubt.