Mini Beef Pizza Pot Pies-Easy Family Favorite
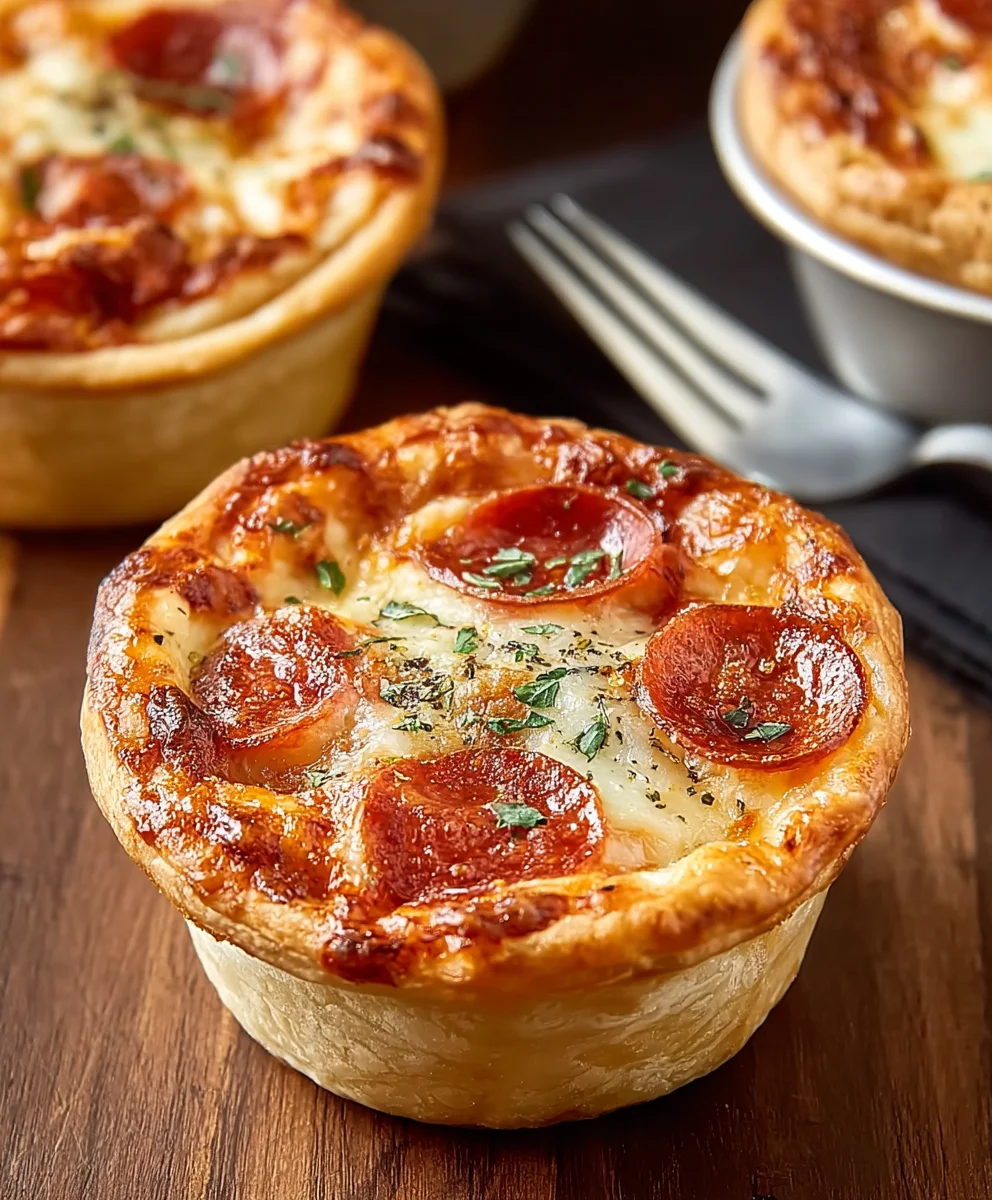
Mini Pizza Pot Pies are the ultimate comfort food hug in a portable package. Imagin extracte all the cheesy, saucy, topping-laden goodness of your favorite pizza, but transformed into individual, delightful little pies, baked to golden perfection in their own adorable crusts. What’s not to love? These aren’t just your average appetizer; they’re a celebration of familiar flavors in a fun, unexpected format. They’re perfect for game nights, kids’ parties, or just a cozy weeknight dinner when you crave something a little special. The magic of Mini Pizza Pot Pies lies in their customizable nature – load them up with beef pepperoni, mushrooms, peppers, or keep it classic with just cheese. Each bite is a burst of savory satisfaction, encased in a buttery, flaky crust that crum extractbles just right.
What Makes These So Special?
These delightful creations elevate the humble pizza into something truly extraordinary. We’re talking about a symphony of textures and tastes that will have everyone reaching for seconds. The secret to their irresistible charm? It’s the perfect balance of a crisp, golden pastry shell that cradles a molten, gooey interior brimming with all your favorite pizza toppings. Whether you’re a fan of classic Margherita or a hearty meat lover, these Mini Pizza Pot Pies deliver that satisfying, nostalgic pizza flavor with an added touch of homemade magic.
Ingredients:
- 8 Refrigerated Biscuits (from a 16 ounce package)
- 1/4 cup Pasta Sauce or Pizza Sauce (meatless variety)
- 3 ounces Beef Beef Pepperoni, chopped into small pieces
- 7-8 ounces Shredded Mozzarella Cheese
- 1 tablespoon Butter, softened (ensure it’s not melted, just pliable)
- 1/2 tablespoon Olive Oil
- 1/4 teaspoon Salt
- 1/4 teaspoon Garlic Powder
- 1/4 teaspoon Italian Seasoning (plus a little extra for sprinkling on top, if desired)
- A pinch of Black Pepper
- Cooking Spray or a little oil for greasing the muffin tins
Preparing the Mini Pizza Pot Pie Base
Step 1: Preheat Your Oven and Prepare the Muffin Tin
First things first, let’s get our oven ready. Preheat your oven to 375°F (190°C). This consistent temperature is key to ensuring our mini pizza pot pies cook evenly and develop a delightful golden-brown crust. While the oven heats up, grab a standard 12-cup muffin tin. You’ll need to grease each cup thoroughly. I find using a cooking spray is the easiest and quickest way to get an even coating. If you don’t have cooking spray, a light brush of olive oil or even a dab of softened butter will work perfectly. Make sure to get into all the nooks and crannies to prevent sticking. A well-greased tin will make removing your finished pot pies a breeze.
Step 2: Flatten and Fit the Biscuit Dough
Now, let’s work with those delicious refrigerated biscuits. Open the package and separate the biscuits. You’ll want to gently flatten each biscuit. Don’t roll them out too thin, but aim to make them about a 3-4 inch diameter circle. The goal here is to create a cup-like shape that will hold all our yummy pizza fillings. Take your flattened biscuit and carefully press it into the bottom and up the sides of each greased muffin cup. You want the dough to come up the sides at least halfway, creating a little pocket for the sauce and cheese. Don’t worry if it’s not perfectly uniform; a slightly rustic look is part of the charm of these mini treats.
Assembling the Flavorful Fillings
Step 3: Crafting the Savory Pizza Filling Mixture
In a small bowl, we’re going to combine the ingredients that will become the heart of our mini pizza pot pies. Add the chopped beef pepperonieroni to the bowl. Next, gently stir in the meatless pasta or pizza sauce. For seasoning, add the 1/4 teaspoon of salt, 1/4 teaspoon of garlic powder, 1/4 teaspoon of Italian seasoning, and a pinch of black pepper. Now, here’s where the magic happens for that cheesy goodness: add about half to two-thirds of your shredded mozzarella cheese to this mixture. Toss everything together until it’s well combined. This mixture will be incredibly flavorful and will be the perfect savory surprise inside each pot pie.
Step 4: Filling the Biscuit Cups with Savory Goodness
With our biscuit cups lined and our filling mixture ready, it’s time to assemble. Carefully beef pepperoni pepperoni and sauce mixture into each biscuit-lined muffin cup. Fill them generously, but try not to overfill, as you still need room for the top layer of cheese. Aim to fill each cup about two-thirds of the way full with the savory mixture. This ensures that when the cheese melts, it will beautifully enclose the filling without overflowing too much during baking.
Baking and Finishing Touches
Step 5: Topping and Baking to Golden Perfection
Now that our cups are filled, it’s time to add the crowning glory: more mozzarella cheese! Sprinkle the remaining shredded mozzarella cheese generously over the top of the filling in each muffin cup. Make sure to distribute it evenly so you get that lovely cheesy pull in every bite. For an extra touch of flavor and visual appeal, you can sprinkle a little extra Italian seasoning on top of the cheese, if you opted to use it. Place the filled muffin tin into your preheated oven. Bake for 15-20 minutes, or until the biscuit crust is golden brown and the cheese is melted and bubbly. You’re looking for that perfect, irresistible golden hue on the crust and a beautifully melted, slightly browned cheese topping.
Step 6: Cooling and Serving Your Mini Pizza Pot Pies
Once they are beautifully baked, carefully remove the muffin tin from the oven. Let the mini pizza pot pies cool in the tin for about 5-10 minutes. This resting period is important, as it allows the fillings to set slightly, making them easier to remove. After the initial cooling, gently loosen the edges of each pot pie with a butter knife or a small offset spatula. Then, carefully lift them out of the muffin tin. You can serve these warm, straight from the tin, for a delightful appetizer or a fun, kid-friendly snack. The softened butter and olive oil mixture you prepared earlier can be lightly brushed over the tops of the warm pot pies as they cool, adding an extra sheen and richness. Enjoy these delightful little bites of pizza goodness!

Conclusion:
And there you have it – your very own batch of delightful Mini Pizza Pot Pies! We’ve walked through the simple steps to create these charming and customizable treats, perfect for any occasion. Whether you’re hosting a game night, packing lunches, or simply craving a fun and satisfying meal, these mini pies are sure to be a hit. Their individual portions make them incredibly convenient, and the possibilities for toppings are truly endless!
I encourage you to get creative with your toppings. Think beyond the traditional beef pepperoni! Consider adding roasted vegetables, different cheeses like feta or goat cheese, or even some spicy sausage. For serving, these are fantastic on their own as a snack or appetizer. They also pair wonderfully with a fresh green salad or a simple side of pasta for a more substantial meal. Don’t be afraid to experiment and find your perfect Mini Pizza Pot Pie combination!
Frequently Asked Questions:
Can I make these ahead of time?
Yes, absolutely! You can assemble the Mini Pizza Pot Pies and store them in the refrigerator for up to 24 hours before baking. If you’re freezing them, ensure they are fully cooled after baking and then store them in an airtight container for up to 2-3 months. Reheat them in a moderate oven until warmed through.
What if I don’t have a muffin tin?
No muffin tin? No problem! You can adapt this recipe for individual ramekins or even use small oven-safe ceramic dishes. Just adjust the baking time slightly as needed, keeping an eye on the crust to ensure it’s golden brown and the filling is bubbly.
Mini Beef Pizza Pot Pies-Easy Family Favorite
An easy and fun family favorite featuring savory beef pepperoni and cheesy goodness baked in a flaky biscuit crust.
Ingredients
-
8 Refrigerated Biscuits (from a 16 ounce package)
-
1/4 cup Pasta Sauce or Pizza Sauce (meatless variety)
-
3 ounces Beef Pepperoni, chopped into small pieces
-
7-8 ounces Shredded Mozzarella Cheese
-
1 tablespoon Butter, softened
-
1/2 tablespoon Olive Oil
-
1/4 teaspoon Salt
-
1/4 teaspoon Garlic Powder
-
1/4 teaspoon Italian Seasoning (plus a little extra for sprinkling on top, if desired)
-
A pinch of Black Pepper
-
Cooking Spray or a little oil for greasing the muffin tins
Instructions
-
Step 1
Preheat your oven to 375°F (190°C) and thoroughly grease a 12-cup muffin tin with cooking spray or oil. -
Step 2
Gently flatten each biscuit to about a 3-4 inch diameter circle. Press each flattened biscuit into the bottom and up the sides of a greased muffin cup, creating a pocket. -
Step 3
In a small bowl, combine the chopped beef pepperoni, meatless pasta or pizza sauce, salt, garlic powder, Italian seasoning, and black pepper. Stir in about half to two-thirds of the shredded mozzarella cheese and mix well. -
Step 4
Spoon the savory filling mixture into each biscuit-lined muffin cup, filling them about two-thirds of the way full. -
Step 5
Sprinkle the remaining shredded mozzarella cheese generously over the top of the filling in each cup. Optionally, sprinkle with extra Italian seasoning. -
Step 6
Bake for 15-20 minutes, or until the biscuit crust is golden brown and the cheese is melted and bubbly. Let cool in the tin for 5-10 minutes before carefully removing.
Important Information
Nutrition Facts (Per Serving)
It is important to consider this information as approximate and not to use it as definitive health advice.
Allergy Information
Please check ingredients for potential allergens and consult a health professional if in doubt.