Easy Bunny Cake Recipe-Fun & Simple Baking
Easy Bunny Cake Recipe – get ready to hop into some serious fun in the kitchen! If you’re looking for a show-stopping dessert that’s surprisingly simple to create, then this easy bunny cake recipe is your golden ticket. It’s the perfect centerpiece for Easter gatherings, spring birthdays, or any occasion where a touch of whimsical charm is needed. We all love a dessert that not only tastes amazing but also brings smiles to faces, and this adorable bunny cake absolutely delivers on both fronts. What makes this particular easy bunny cake recipe so special? It’s the delightful combination of a moist, tender cake base (that’s customizable, by the way!) with a frosting that’s as delightful to decorate as it is to eat. Forget complicated techniques; this recipe is designed for home bakers of all skill levels, promising a delightful outcome without the stress. Prepare to amaze your friends and family with this truly charming creation!
Easy Bunny Cake Recipe
Spring is a time of renewal, and what better way to celebrate than with a festive and adorable bunny cake? This recipe is designed to be incredibly straightforward, perfect for bakers of all skill levels, even those who might consider themselves a little baking-averse. We’ll transform a couple of simple round cake layers into a charming bunny that’s sure to bring smiles to faces, young and old. Forget complicated sculpting or intricate piping; this bunny is all about fun and deliciousness. Let’s get started on creating a centerpiece that’s as delightful to make as it is to eat!
Ingredients:
Baking the Bunny Base
Before we can transform our cakes into bunnies, we need them to be ready! If you’re using a cake mix, follow the package instructions precisely for the best results. If you prefer a homemade cake, ensure your favorite recipe is baked and completely cooled. Cooling is crucial; attempting to frost a warm cake is a recipe for disaster, leading to melted frosting and a lopsided bunny. Once your cake layers are fully cooled, you can proceed to the next exciting stage. You’ll want to make sure they are relatively flat. If they have domed significantly during baking, you can carefully trim the tops with a serrated knife to create a level surface. This will make assembling and frosting your bunny much easier and ensure a cleaner look.
Assembling Your Adorable Bunny
Now for the fun part: bringin extractg our bunny to life!
Step 1: Preparing the Cake Layers
Take one of your cooled round cake layers and place it on your serving platter or cake board. This will be the bunny’s body. Apply a generous layer of white frosting all over the top of this cake layer. Don’t be shy with the frosting; it acts as the “glue” for the second layer and adds to the overall deliciousness. Now, carefully place the second round cake layer on top of the frosted first layer. This second layer will serve as the bunny’s head. Again, apply a good amount of white frosting to the top of this head layer.
Step 2: Creating the Bunny Shape with Frosting
This is where we start to give our bunny its iconic shape. Using your white frosting, begin extract to frost the entire cake, covering both layers smoothly. Think about gently rounding the edges where the “head” meets the “body” to create a more organic, bunny-like form. You can use an offset spatula or a regular spatula for this. Don’t aim for absolute perfection at this stage; the texture of the frosting will add to the fluffy appeal of the bunny. For a smoother finish, you can dip your spatula in warm water and then gently smooth the frosting, but a slightly textured look is perfectly acceptable and often quite charming.
Step 3: Crafting the Bunny’s Ears
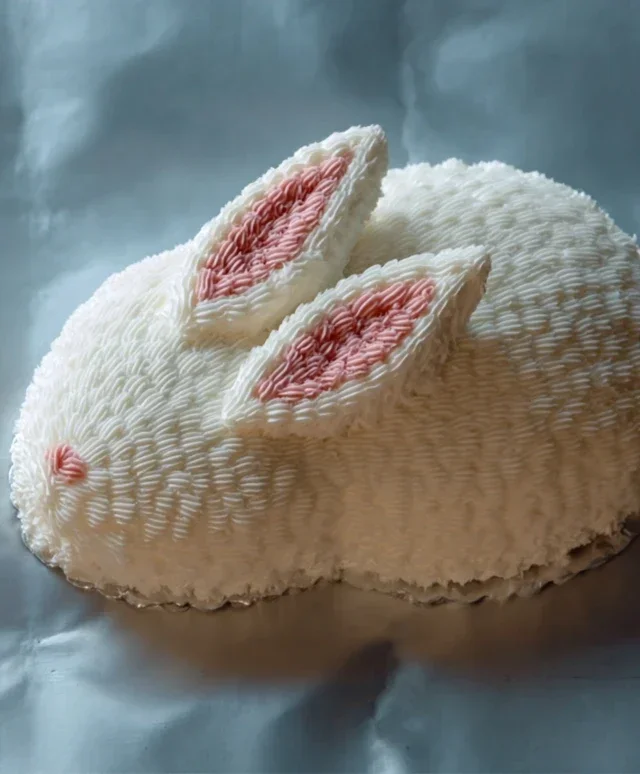
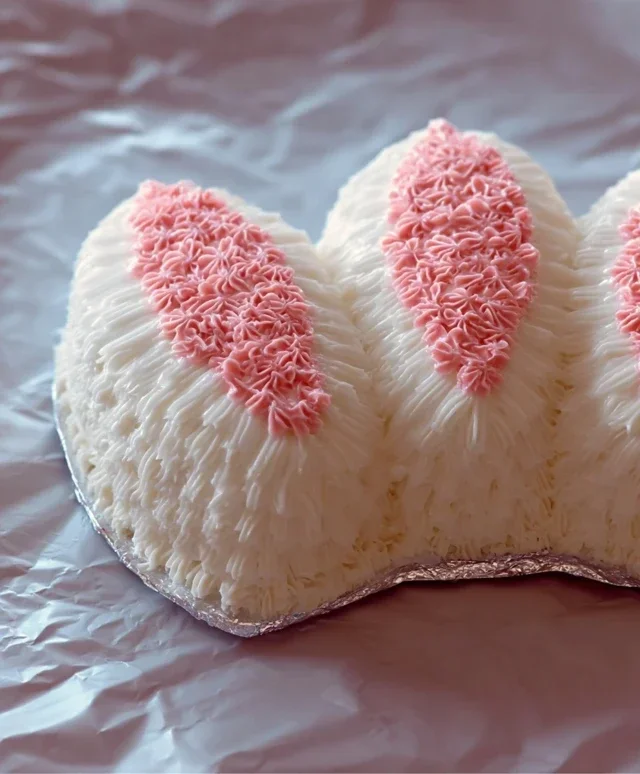
This is a key element of our bunny! You have a couple of options for the ears. If you have extra cake batter, you could bake two small, ear-shaped cakes beforehand and frost them. However, for the ultimate ease, we can create them directly from frosting. Using your piping bags, fill one with white frosting. Pipe two large, elongated oval shapes on top of the bunny’s head, extending upwards and slightly outwards. These are your bunny ears! If you want them to be a bit more structured, you can pipe them onto parchment paper first, let them firm up slightly in the refrigerator, and then carefully place them on the cake. Alternatively, you can pipe them directly onto the cake and then gently shape them with your spatula. For a touch of dimension, you can pipe a slightly smaller, narrower oval of pink frosting inside each white ear.
Step 4: Adding the Bunny’s Face Details
Now it’s time to give our bunny its personality! Fill a piping bag with chocolate icing or melted chocolate. Use this to pipe two small dots for the eyes on the bunny’s face. Then, pipe a small upside-down triangle or a slightly curved line for the nose. This is where you can get creative with the expression of your bunny! For whiskers, you can pipe thin lines extending outwards from the nose area, or if you prefer, you can carefully place thin strands of licorice or thin chocolate sticks.
Step 5: Decorating with Jellybeans and Candy Accents
The final touch to our easy bunny cake is the decoration! Use your piping bag filled with pink frosting to create a fluffy tail on the back of the bunny’s body. You can make this a simple swirl or a more elaborate fluffy shape. Scatter jellybeans or colorful round candies around the base of the cake to create a vibrant, festive border. You can also place a few jellybeans on the bunny’s body for extra pops of color, perhaps to resemble little flower blossoms or just for fun. If you have extra pink frosting, you can add a few small dots to the bunny’s cheeks for a rosy blush.
This easy bunny cake recipe is a fantastic way to bring some springtime joy to your table. It’s forgiving, fun, and ultimately, incredibly delicious. Enjoy the process and the delightful result!
Conclusion:
And there you have it – your incredibly simple and utterly adorable Easy Bunny Cake Recipe! This recipe is truly a winner because it proves that you don’t need to be a professional baker to create something special. With just a few basic ingredients and minimal decorating steps, you’ll have a delightful centerpiece that’s perfect for Easter, spring birthdays, or any occasion that calls for a touch of whimsy. The moist vanilla cake combined with the fluffy buttercream frosting is a classic combination that everyone loves.
For serving, this bunny cake is fantastic on its own, but consider pairing it with fresh berries or a dollop of whipped cream for an extra touch of elegance. If you’re feeling adventurous with variations, you could easily swap the vanilla extract for almond or lemon for a different flavor profile. Tinting the frosting with pastel colors like pink or blue adds even more festive charm. Don’t hesitate to get creative with edible glitter or sprinkles! I truly encourage you to give this easy bunny cake recipe a try – it’s guaranteed to bring smiles to faces of all ages.
Frequently Asked Questions:
Can I make this bunny cake ahead of time?
Absolutely! You can bake and cool the cake layers a day in advance. Once completely cool, wrap them tightly in plastic wrap and store them at room temperature. The frosting can also be made ahead and stored in an airtight container in the refrigerator. Just let it soften slightly and re-whip it before frosting the cake. This makes assembly on the day of your event a breeze!
What if I don’t have a bundt pan for the bunny shape?
No worries at all! While a bundt pan makes the bunny shape effortless, you can adapt this recipe. Simply bake the cake batter in two 8-inch round pans. Once cooled, you can stack them and then use frosting to shape them into a bunny, or even cut out bunny shapes using a cookie cutter. You could also use a loaf pan for a simpler, less shaped cake that can still be decorated with bunny ears and a face.
How long does the cake typically stay fresh?
This delicious cake is best enjoyed within 2-3 days of being made. Store any leftovers tightly covered at room temperature. If your kitchen is particularly warm, refrigerating it is an option, but remember to let it come back to room temperature before serving for the best texture and flavor.
Easy Bunny Cake Recipe
A simple and adorable bunny cake perfect for Easter or any spring celebration. This recipe uses store-bought components for a quick and easy assembly.
Ingredients
-
Two round cake layers (use one cake mix or your favorite homemade recipe)
-
White frosting (ready-made or your favorite homemade recipe)
-
Pink frosting (or use pink gel food coloring on white frosting)
-
Chocolate icing or melted chocolate for details
-
Jellybeans or colorful round candies
-
Piping bags
Instructions
-
Step 1
If baking your own cake layers, prepare and bake them according to your recipe or cake mix instructions. Allow them to cool completely. -
Step 2
Place one cake layer on your serving plate. Frost the top with a generous layer of white frosting. Place the second cake layer on top. -
Step 3
Crumb coat the entire cake with a thin layer of white frosting. Refrigerate for 15-20 minutes to set. -
Step 4
Apply a final, smooth layer of white frosting to the entire cake, covering any remaining crumb coat. -
Step 5
Using a piping bag fitted with a round tip, pipe two large ears on the top of the cake using pink frosting. You can also pipe smaller pink centers inside the ears. -
Step 6
Use chocolate icing or melted chocolate in a piping bag to create the bunny’s eyes, nose, and mouth. Add whiskers if desired. -
Step 7
Decorate the bunny’s cheeks and surrounding area with jellybeans or colorful round candies.
Important Information
Nutrition Facts (Per Serving)
It is important to consider this information as approximate and not to use it as definitive health advice.
Allergy Information
Please check ingredients for potential allergens and consult a health professional if in doubt.