Easter Bunny Chick Cupcakes- Cute & Easy Recipe
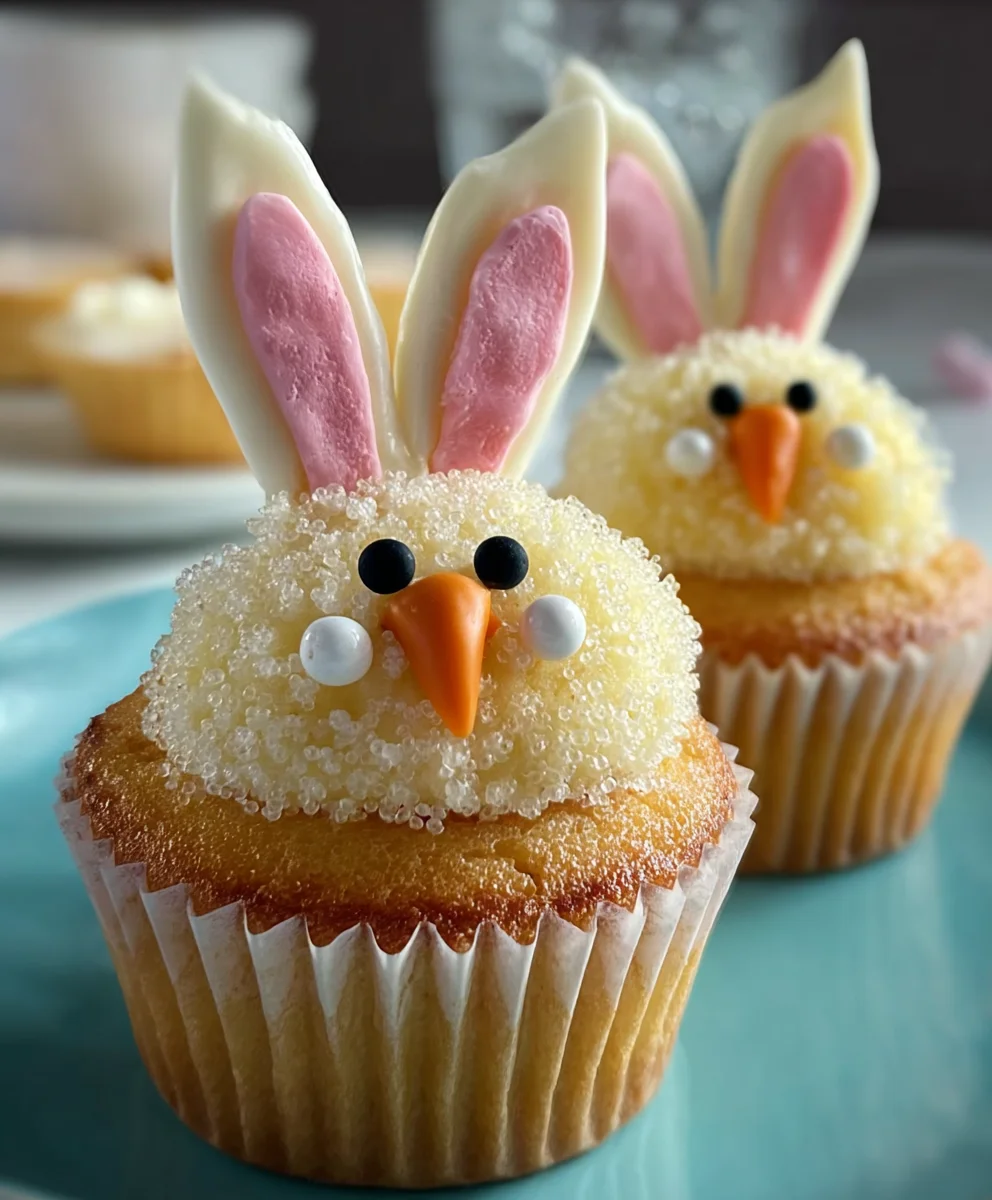
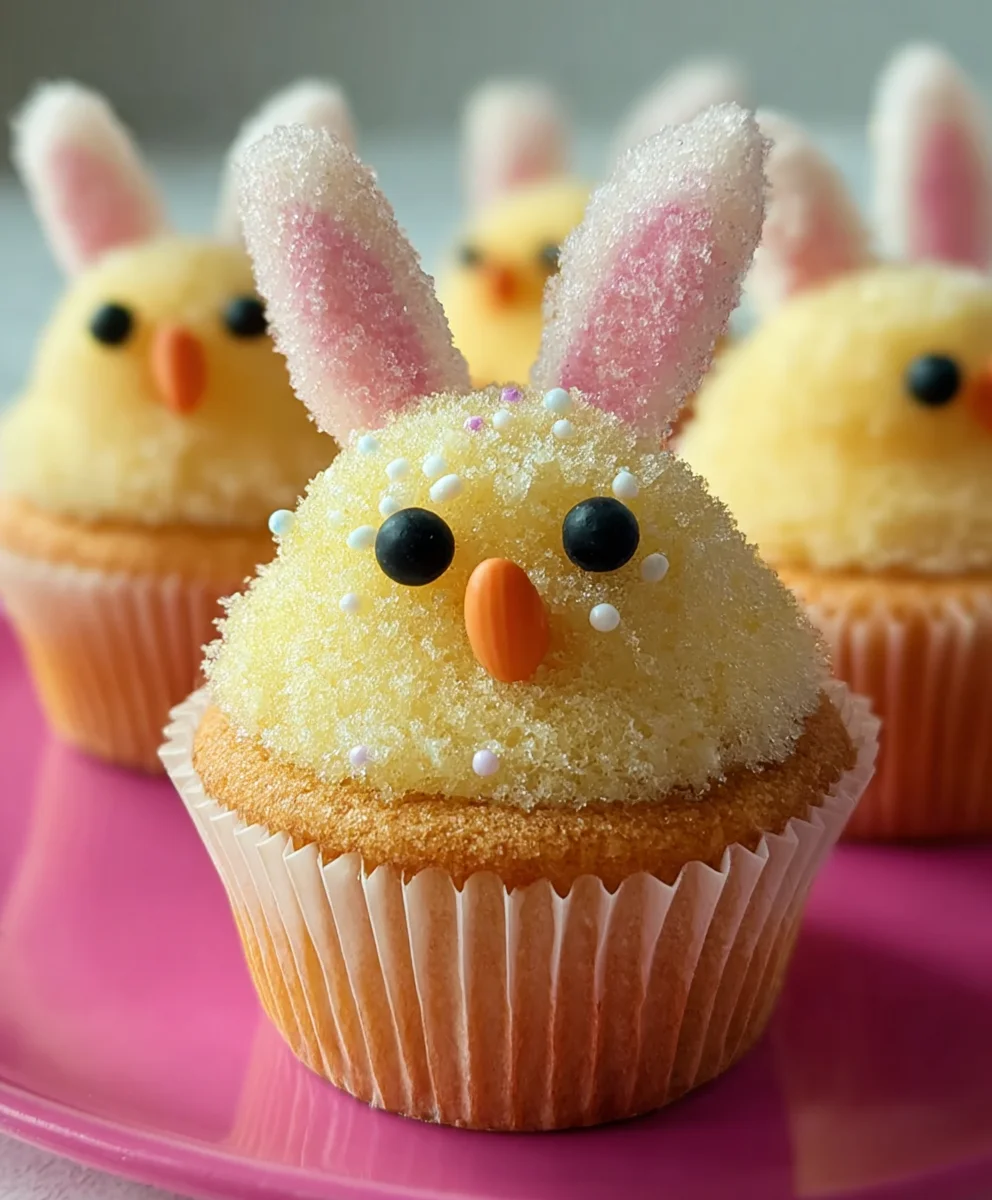
Easter Bunny and Chick Cupcakes are more than just a dessert; they are a vibrant celebration on a plate, embodying the joy and whimsical spirit of springtime. If you’ve ever seen a child’s face light up at the sight of these adorable treats, you know their power. They are the quintessential edible decoration for any Easter gathering, bringin extractg smiles and a touch of magic to your table. What makes these Easter Bunny and Chick Cupcakes so universally beloved? It’s the perfect marriage of delightful flavors and utterly charming presentation. Each bite offers a fluffy cake base, often infused with a hint of vanilla or lemon, perfectly complemented by a creamy frosting that forms the canvas for our adorable characters. But it’s the visual artistry, transforming simple cupcakes into playful bunnies with candy ears and fluffy tails, and cheerful chicks with piped frosting feathers, that truly sets them apart and makes them an unforgettable centerpiece for your Easter festivities.
Ingredients:
- 1 recipe Vanilla Cupcakes (or your favorite cake mix), prepared according to package directions and cooled completely
- 1 recipe Fluffy Vanilla Frosting (or store-bought vanilla frosting), prepared or ready to use
- Yellow and white sprinkles
- Large and mini marshmallows
- Pink colored sanding sugar
- Black decorator icing
- Jelly beans (specifically pink ones for bunny noses)
- Orange colored gum or M&Ms (these will be our chick beaks)
- Yellow food coloring (for tinting some of the frosting for our chicks)
Preparing Your Cupcakes and Frosting
First things first, ensure your vanilla cupcakes are completely cooled. This is a crucial step because warm cupcakes will melt your frosting, creating a sticky, unmanageable mess. If you’re using a box mix, follow the package instructions precisely and allow them ample time to cool on a wire rack. For the frosting, whether you’ve made a fluffy batch from scratch or are using a store-bought tub, make sure it’s at room temperature and easily spreadable. If your frosting is too stiff, a quick whisk or a tablespoon of milk at a time can help achieve the right consistency.
Creating the Easter Bunny Cupcakes
Now for the fun part – decorating! Let’s start with our adorable Easter bunnies. We’ll be using the large marshmallows to create the bunny ears. Take a large marshmallow and, using a sharp knife or kitchen scissors, cut it in half vertically. You’ll get two slightly curved pieces that will serve as perfect bunny ears.
Now, grab your cooled cupcakes and your vanilla frosting. Generously frost each cupcake. It doesn’t need to be perfectly smooth; a rustic look can be charming! Before the frosting sets, gently press the cut side of your marshmallow halves into the top of the cupcake, angled slightly outwards, to create the bunny ears.
For the bunny’s face, take a pink jelly bean and press it into the lower center of the cupcake, just below the ears, for a sweet little nose. Then, using your black decorator icing and a very fine tip (or even the tip of a toothpick if you don’t have a decorating pen), carefully draw two small dots above the jelly bean nose to create the bunny’s eyes. You can also add a tiny little mouth if you like, or leave it as just eyes and a nose for a minimalist cute look.
Transforming into Cheerful Chick Cupcakes
Next up, our bright and cheerful Easter chicks! This is where the yellow food coloring comes in handy. Take a portion of your vanilla frosting – about half to two-thirds of it – and add a few drops of yellow food coloring. Mix thoroughly until you achieve a lovely, vibrant yellow hue. You can add more coloring gradually to get your desired shade.
Frost your remaining cooled cupcakes with this yellow frosting. Again, don’t worry about perfection; a slightly textured top is great for a fluffy chick! Now, for the chick’s beak, take your orange gum or M&Ms. You might need to cut the orange gum into small triangular shapes with scissors to resemble a beak. Gently press one of these into the top center of the yellow-frosted cupcake.
For the chick’s eyes, use your black decorator icing. Draw two small, round dots above the beak. You can place them close together for a surprised look, or slightly wider apart. To add a touch of texture and give our chicks a bit more character, you can sprinkle some yellow and white sprinkles around the base of the cupcake or lightly over the top.
Adding the Finishing Touches and Extra Flair
To elevate your Easter Bunny and Chick Cupcakes even further, consider these extra touches. For the bunnies, you can lightly dust the marshmallow ears with a bit of pink sanding sugar before placing them on the cupcake. This gives them a subtle, rosy glow. You can also use the pink sanding sugar around the base of the bunny cupcakes for a decorative border.
For the chicks, if you want to add some “fluff” or texture, you can use a fork to gently swirl the yellow frosting before adding the beak and eyes. Mini marshmallows can also be used creatively. You could lightly toast some mini marshmallows and then cut them in half to create fluffy pom-pom tails for your bunnies or chicks, if you desire! You can also stick a few whole mini marshmallows around the base of the cupcakes for a snowy effect, especially for the bunnies. Remember, creativity is key here! Don’t be afraid to experiment with different sprinkle combinations on both the bunnies and chicks. White sprinkles can mimic a fluffy tail for the bunnies, or add sparkle to the chicks.
Conclusion:
You’ve now mastered the art of creating adorable Easter Bunny and Chick Cupcakes! This recipe offers a delightful and charming way to celebrate the Easter season, bringin extractg smiles to faces of all ages. These cupcakes are not just a treat for the taste buds but also a feast for the eyes, making them perfect for Easter gatherings, classroom parties, or simply as a fun family baking project. Don’t be afraid to let your creativity shine through as you decorate – the more personality you inject, the better!
For serving, these Easter Bunny and Chick Cupcakes are best enjoyed at room temperature, allowing the frosting to soften just slightly. They pair wonderfully with a glass of milk or a light, fruity tea. Consider setting up a cupcake decorating station with extra sprinkles and edible markers for an interactive dessert experience that kids will adore.
If you’re looking for variations, feel free to experiment with different cake flavors like lemon or vanilla bean. You can also change up the frosting colors to create a more diverse Easter basket effect. For a gluten-free option, simply substitute your favorite gluten-free flour blend.
We truly hope you have a fantastic time baking and decorating these Easter Bunny and Chick Cupcakes. Embrace the festive spirit and enjoy every delicious bite!
Frequently Asked Questions:
Can I make the cupcake batter and frosting ahead of time?
Yes, absolutely! The cupcake batter can be made a day in advance and stored in the refrigerator. The frosting can also be prepared a day ahead and kept in an airtight container in the fridge. Just be sure to bring both to room temperature and give them a good whisk or stir before proceeding with baking and decorating.
How should I store leftover Easter Bunny and Chick Cupcakes?
Store any uneaten Easter Bunny and Chick Cupcakes in an airtight container at room temperature for up to 2 days. If your frosting is particularly delicate or the weather is warm, you might prefer to store them in the refrigerator, but let them sit out for about 30 minutes before serving to soften the frosting.
Easter Bunny Chick Cupcakes
Cute and easy Easter cupcakes shaped like bunnies and chicks.
Ingredients
-
1 recipe Vanilla Cupcakes (or your favorite cake mix)
-
1 recipe Fluffy Vanilla Frosting (or store-bought vanilla frosting)
-
Yellow and white sprinkles
-
Large and mini marshmallows
-
Pink colored sanding sugar
-
Black decorator icing
-
Jelly beans (pink ones for bunny noses)
-
Orange colored gum or M&Ms (for chick beaks)
-
Yellow food coloring (for tinting frosting)
Instructions
-
Step 1
Ensure cupcakes are completely cooled. Prepare frosting to be spreadable. If too stiff, add milk one tablespoon at a time. -
Step 2
For bunnies: Cut large marshmallows in half vertically for ears. Generously frost cooled cupcakes. Press cut marshmallow halves into frosting for ears. Press a pink jelly bean for the nose. Draw eyes and mouth with black decorator icing. -
Step 3
For chicks: Tint a portion of vanilla frosting yellow with food coloring. Frost remaining cooled cupcakes with yellow frosting. -
Step 4
For chick beaks, cut orange gum into small triangles. Gently press one into the top center of each yellow-frosted cupcake. Draw two small dots with black decorator icing for eyes. -
Step 5
Add finishing touches: Dust bunny ear marshmallows with pink sanding sugar. Sprinkle yellow and white sprinkles around the base of cupcakes. Use a fork to swirl chick frosting for texture.
Important Information
Nutrition Facts (Per Serving)
It is important to consider this information as approximate and not to use it as definitive health advice.
Allergy Information
Please check ingredients for potential allergens and consult a health professional if in doubt.