Biscoff Cookie Butter Cheesecake Pops – Delicious Treats
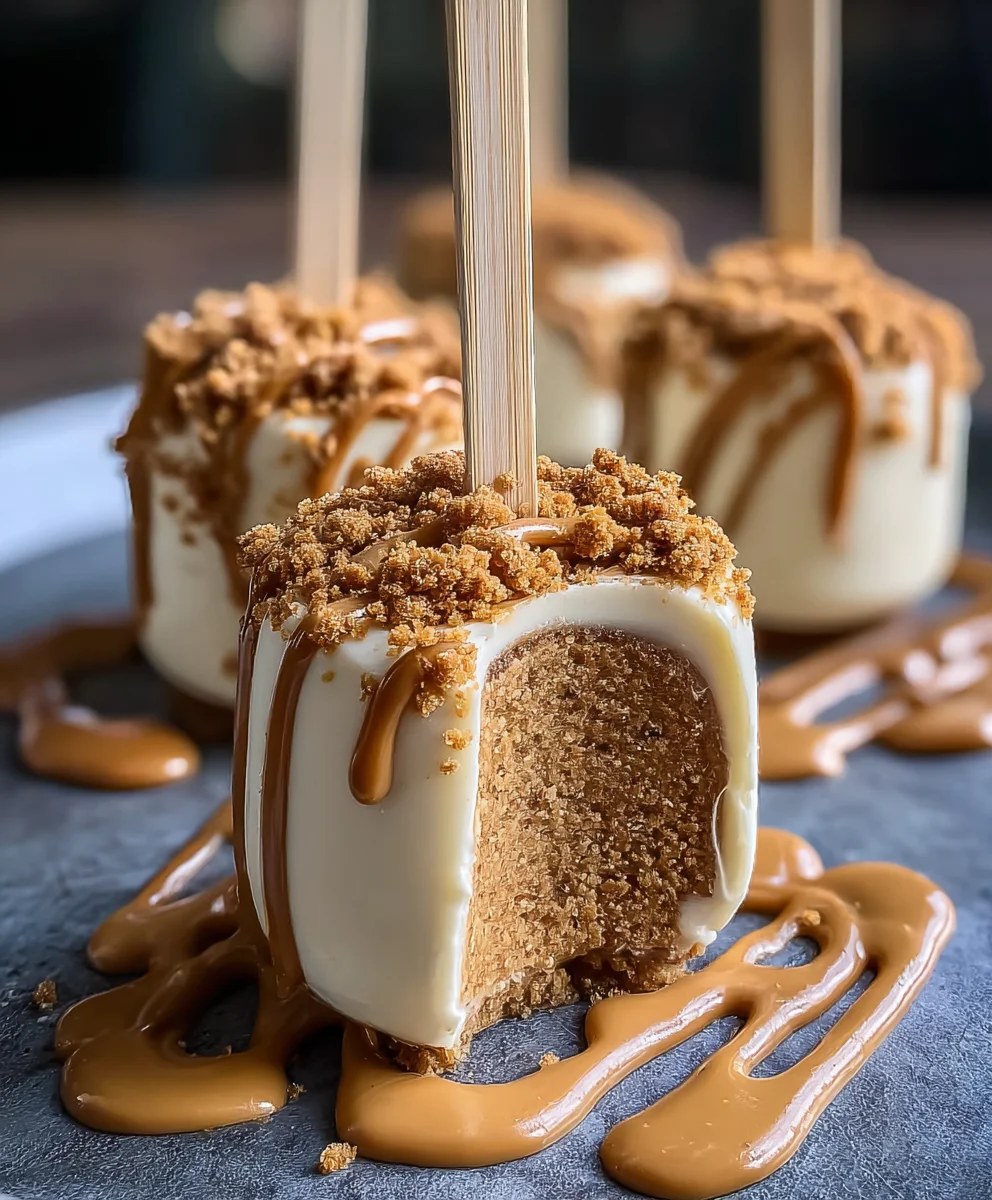
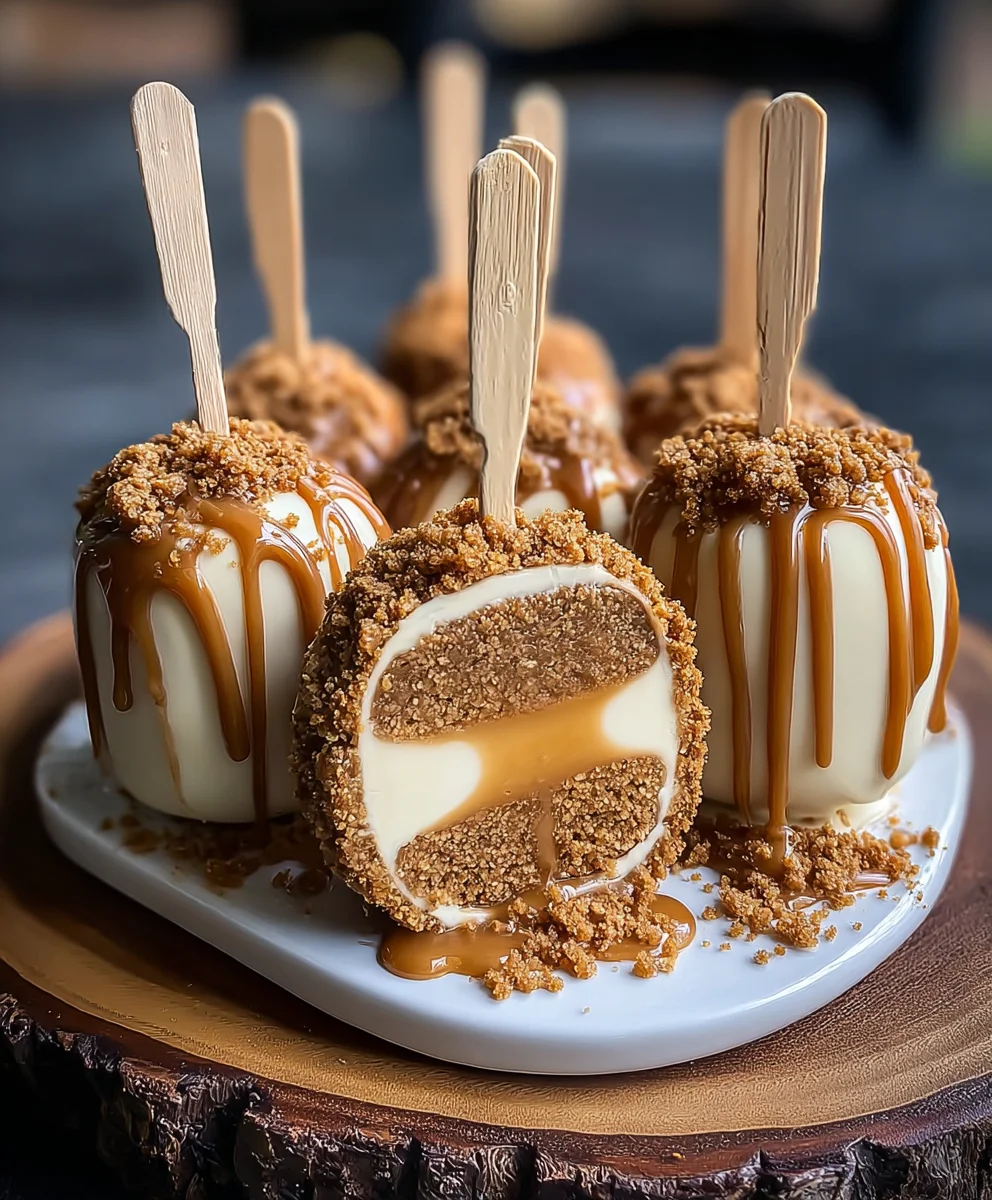
Biscoff Cookie Butter Cheesecake Pops are more than just a dessert; they’re a miniature explosion of pure joy, a delightful little bite that captures the essence of cozy indulgence and sophisticated sweetness. If you’ve ever found yourself lost in the creamy, spiced allure of Biscoff cookies and their magical transformation into cookie butter, you already know the irresistible gravitational pull of this flavor. These pops take that beloved combination and elevate it into a portable, party-perfect treat. What makes them so utterly special? It’s the perfect marriage of a velvety smooth cheesecake filling, infused with that unmistakable cinnamon-sugar warmth of Biscoff cookie butter, all encased in a rich chocolate shell and studded with crum extractbled Biscoff cookies. Each bite delivers a symphony of textures and tastes – the slight snap of chocolate, the creamy coolness of cheesecake, arum extractthe crumbly crunch of cookie. They are wonderfully easy to make, yet they look and taste like something truly gourmet, guaranteed to impress guests or simply satisfy your own deepest sweet cravings.
Ingredients:
- 8 oz cream cheese, softened
- ½ cup powdered sugar
- 1 teaspoon vanilla extract
- ½ cup whipped cream (or Cool Whip)
- ½ cup crushed Biscoff cookies
- ½ cup Biscoff cookie butter
- 2 tablespoons heavy cream (optional, for thinning)
- Whole Biscoff cookies, for dipping
- Extra crushed Biscoff cookies, for garnish
- Popsicle sticks
Preparing the Biscoff Base
Step 1: Creaming the Foundation
First, we need to get our cream cheese perfectly smooth. Ensure your 8 ounces of cream cheese has been sitting at room temperature for at least an hour, or even two, until it’s truly soft and yielding. This is crucial for a lump-free cheesecake filling. In a medium-sized mixing bowl, add the softened cream cheese. Using an electric mixer on medium speed, beat the cream cheese until it’s completely smooth and creamy. You want to eliminate any small lumps so that your cheesecake pops have a luxurious texture. This usually takes about 1-2 minutes.
Step 2: Sweetening and Flavoring
Once the cream cheese is beautifully smooth, it’s time to add the sweetness and a touch of classic flavor. Gradually add ½ cup of powdered sugar to the cream cheese, beating on low speed initially to prevent a sugar cloud from erupting from your bowl. Once the powdered sugar is incorporated, increase the speed to medium and beat until the mixture is light and fluffy. This step is vital for achieving that signature cheesecake airy texture. Next, add 1 teaspoon of vanilla extract. Vanilla is the unsung hero of many desserts, and in this case, it beautifully complements the warm spices of the Biscoff. Beat for another 30 seconds until the vanilla is fully distributed.
Incorporating the Biscoff Magic
Step 3: The Biscoff Infusion
Now for the star ingredient: the Biscoff cookie butter! Add ½ cup of Biscoff cookie butter to the cream cheese mixture. This is where the magic happens. Beat on medium speed until the cookie butter is fully incorporated and you have a wonderfully smooth, caramel-colored batter. The aroma at this stage is absolutely divine! Scrape down the sides of the bowl occasionally with a spatula to ensure everything is being mixed evenly. The batter should be thick and rich. If you find your mixture is a little too stiff to work with, this is where the optional 2 tablespoons of heavy cream come in handy. Add them now and beat until just combined. This will slightly loosen the batter, making it easier to handle later.
Step 4: Adding Texture and Lightness
To give our cheesecake pops a delightful texture and an even lighter feel, we’ll fold in the whipped cream and crushed cookies. Gently fold in ½ cup of whipped cream (or Cool Whip) into the Biscoff cream cheese mixture. Use a spatula and a gentle, sweeping motion. We’re not looking to whip more air into it; rather, we want to maintain the airiness from the whipped cream and combine it smoothly. Once the whipped cream is mostly incorporated, gently fold in ½ cup of crushed Biscoff cookies. These little crunchy bits will provide a lovely textural contrast to the smooth cheesecake filling. Be careful not to overmix; a few streaks of cookie are perfectly fine.
Assembling and Freezing
Step 5: Shaping and Sticking
Now it’s time to transform our delicious mixture into pops! We’ll need a mini muffin tin lined with mini muffin liners or a similar small mold that will help us create bite-sized portions. Alternatively, you can use a small ice cube tray. For each pop, spoon about 1-2 tablespoons of the Biscoff cheesecake mixture into a mini muffin liner or mold. Aim for uniform sizes so they freeze evenly. Once you’ve filled your molds, gently press a whole Biscoff cookie on top of each portion. This will serve as the base of our pop. Now, carefully insert a popsicle stick into each Biscoff cookie base, pushing it about halfway into the cheesecake mixture. Ensure the stick is firmly in place. Place the filled molds into the freezer and freeze for at least 2-3 hours, or until firm enough to handle. This freezing step is crucial for preventing them from melting when you dip them in melted chocolate or just handle them.
Finishing Touches
Step 6: The Biscoff Coating (Optional but Recommended)
While your cheesecake pops are freezing, prepare your coating. Melt about 1 cup of your favorite chocolate chips (milk, dark, or white) in a microwave-safe bowl in 30-second intervals, stirring between each, until smooth. You can also use candy melts for a more vibrant color. If the melted chocolate is too thick, stir in a teaspoon of vegetable oil or coconut oil to thin it out. Once the cheesecake pops are frozen solid, remove them from the freezer and carefully lift them out of their molds using the popsicle sticks. Dip each pop into the melted chocolate, letting any excess drip back into the bowl. For an extra Biscoff kick, immediately sprinkle the freshly dipped pops with extra crushed Biscoff cookies before the chocolate sets. Place the coated pops on a parchment-lined baking sheet and return them to the freezer for another 15-20 minutes, or until the chocolate is completely firm. These Biscoff Cookie Butter Cheesecake Pops are best enjoyed directly from the freezer.
Conclusion:
There you have it – a delightful journey into creating Biscoff Cookie Butter Cheesecake Pops! This recipe offers a perfect balance of creamy cheesecake, the irresistible spiced sweetness of Biscoff, and the fun of a pop-able treat. We’ve walked through every step, from crafting the rich cheesecake filling to skillfully enrobing them in decadent chocolate. These Biscoff Cookie Butter Cheesecake Pops are a guaranteed showstopper for any gathering, a sweet indulgence for a quiet afternoon, or even a thoughtful homemade gift.
For serving suggestions, these pops are fantastic on their own, or you could present them on a platter alongside fresh berries for a burst of color and freshness. They also pair wonderfully with a cup of coffee or a glass of milk. Don’t be afraid to get creative with variations! Consider adding a sprinkle of crushed Biscoff cookies on top before the chocolate sets, or even a drizzle of white chocolate for a beautiful contrast. You could also experiment with different types of chocolate for the coating, such as dark or milk chocolate.
I truly hope you enjoy making and, more importantly, eating these Biscoff Cookie Butter Cheesecake Pops. Don’t hesitate to share your creations and any adaptations you make. Happy baking!
Frequently Asked Questions:
Q: Can I make Biscoff Cookie Butter Cheesecake Pops ahead of time?
A: Absolutely! These cheesecake pops can be made up to 2-3 days in advance and stored in an airtight container in the refrigerator. This makes them an excellent make-ahead option for parties or special occasions.
Q: My chocolate coating is not setting properly. What could be the issue?
A: Several factors can affect chocolate setting. Ensure your chocolate is properly tempered if you’re using pure chocolate. If you’re using chocolate chips or candy melts, they usually set up well on their own. Make sure the cheesecake pops are thoroughly chilled before dipping, as this helps the chocolate set quickly. Also, avoid dipping them in a very warm environment.
Q: Can I use a different type of cookie butter instead of Biscoff?
A: While Biscoff cookie butter is what gives these their signature flavor, you could experiment with other speculoos-style cookie butters if you can find them. The flavor profile might differ slightly, but it could still result in a delicious variation!
Biscoff Cookie Butter Cheesecake Pops – Delicious Treats
Delightful no-bake cheesecake pops infused with the warm spice of Biscoff cookie butter and finished with whole Biscoff cookies.
Ingredients
-
8 oz cream cheese, softened
-
½ cup powdered sugar
-
1 teaspoon vanilla extract
-
½ cup whipped cream (or Cool Whip)
-
½ cup crushed Biscoff cookies
-
½ cup Biscoff cookie butter
-
2 tablespoons heavy cream (optional, for thinning)
-
Whole Biscoff cookies
-
Extra crushed Biscoff cookies for garnish
-
Popsicle sticks
Instructions
-
Step 1
Beat softened cream cheese until smooth and creamy. -
Step 2
Gradually add powdered sugar and vanilla extract, beating until light and fluffy. -
Step 3
Incorporate Biscoff cookie butter until fully combined. Add optional heavy cream if the mixture is too stiff. -
Step 4
Gently fold in whipped cream and crushed Biscoff cookies. -
Step 5
Spoon mixture into mini muffin liners or molds, top with a whole Biscoff cookie, and insert a popsicle stick. Freeze for at least 2-3 hours until firm. -
Step 6
Melt chocolate chips (if using for coating). Dip frozen pops into melted chocolate, sprinkle with extra crushed cookies, and refreeze until firm.
Important Information
Nutrition Facts (Per Serving)
It is important to consider this information as approximate and not to use it as definitive health advice.
Allergy Information
Please check ingredients for potential allergens and consult a health professional if in doubt.