Easter Bunny Coconut Tails- Sweet & Easy Recipe
Easter Bunny Coconut Tails are the whimsical, delightful treats that have been hopping into our hearts and onto our Easter tables for years. There’s something undeniably charming about these fluffy, sweet delights, and it’s no wonder they’re a perennial favorite for both kids and adults. The combination of chewy coconut and a touch of sweetness, all shaped into adorable bunny tails, just screams springtime celebration. What truly sets these Easter Bunny Coconut Tails apart is their simplicity, making them incredibly accessible for home bakers, yet their impact is anything but ordinary. They offer that perfect bite-sized sweetness that complements a festive spread without being too heavy, and let’s be honest, who can resist the sheer cuteness of them?
Get ready to add a touch of magic to your Easter with our easy-to-follow recipe for these irresistible Easter Bunny Coconut Tails.
Easter Bunny Coconut Tails
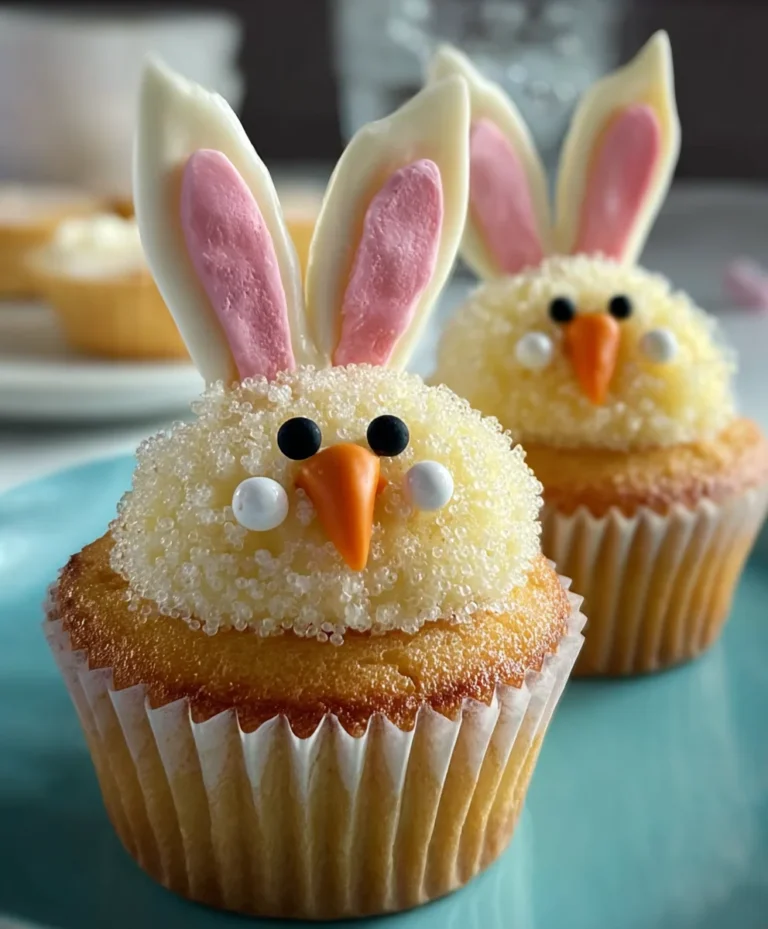
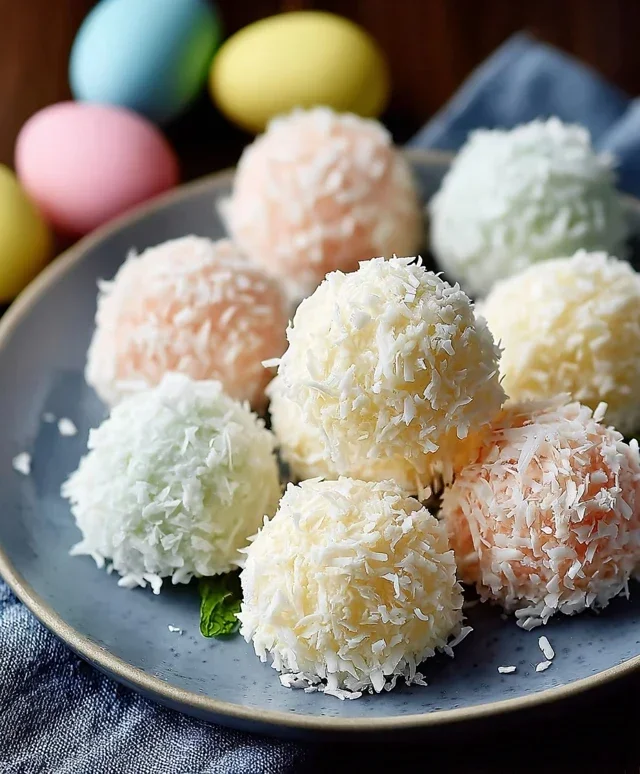
These Easter Bunny Coconut Tails are a delightful and easy treat that will bring a smile to everyone’s face this spring. Imagin extracte fluffy, sweet coconut mixed with a creamy binding, all dipped in smooth white chocolate and adorned with cute pink details. They look just like little bunny tails, perfect for an Easter basket or a festive dessert table. My family absolutely adores these, and they’re so simple that even the kids can help make them. Let’s get started on creating these adorable Easter treats!
Ingredients:
Preparing the Coconut Mixture
The first step is to create the base for our bunny tails. This mixture is wonderfully fragrant and easy to work with.
Melting the Marshmallows and Butter
In a medium saucepan, combine the mini marshmallows and the butter. Place this saucepan over low heat. It’s important to use low heat to prevent the marshmallows from scorching or burning. Stir continuously with a spatula or wooden spoon. You want the marshmallows to melt completely and become smooth and gooey, incorporating the butter into a creamy mixture. This process usually takes about 3-5 minutes. Be patient and keep stirring gently. Once everything is melted and smooth, remove the saucepan from the heat.
Add the vanilla extract to the melted marshmallow and butter mixture. Stir it in well. The vanilla extract adds a lovely subtle flavor that complements the sweetness of the coconut and marshmallows beautifully.
Now, it’s time to add the star of the show: the shredded coconut. Pour the 2 cups of shredded coconut into the saucepan with the marshmallow mixture. Using your spatula, stir and fold the coconut into the gooey mixture until every strand is coated. This can be a little sticky, but that’s exactly what we want! The mixture should become cohesive and hold together when you press it. If it seems a bit too dry, you can add another tablespoon of butter, but usually, this ratio works perfectly.
Forming the Bunny Tails
Once the coconut mixture is ready, it’s time to shape it into those adorable bunny tails.
Shaping the Tails
Allow the coconut mixture to cool slightly for a few minutes. It will still be warm and pliable, but not so hot that it’s uncomfortable to handle. You can lightly grease your hands with a little bit of butter or cooking spray if you find the mixture is sticking too much. Take about a tablespoon of the coconut mixture and roll it between your palms to form a small, compact ball or an oval shape, resembling a plump bunny tail. Aim for a size that’s easy to handle and dip. Place the formed tails on a baking sheet lined with parchment paper. This will prevent them from sticking to the surface as they firm up. Continue this process until you’ve used up all the coconut mixture. You should get around 20-25 tails, depending on their size.
Chilling and Setting
To ensure our bunny tails hold their shape and are ready for dipping, we need to chill them.
Chilling for Stability
Once all the bunny tails are shaped and arranged on the parchment-lined baking sheet, place the entire sheet into the refrigerator for at least 30 minutes. This chilling period is crucial. It allows the marshmallow and butter mixture to firm up, making the coconut tails solid enough to handle without falling apart when we dip them in chocolate. If you’re short on time, you can pop them into the freezer for about 15-20 minutes, but be careful not to freeze them solid.
Dipping in White Chocolate
Now for the decadent part – coating our coconut tails in smooth white chocolate.
Melting the White Chocolate
While the coconut tails are chilling, prepare your white chocolate. Place the 1 cup of white chocolate chips in a microwave-safe bowl. Microwave in 30-second intervals, stirring thoroughly after each interval, until the chocolate is completely melted and smooth. Be very careful not to overheat white chocolate, as it can seize up easily. Alternatively, you can melt the white chocolate chips in a double boiler, which offers more gentle heat control. Once melted and smooth, set aside.
Coating the Tails
Retrieve the chilled coconut tails from the refrigerator. Using a fork or a toothpick, dip each coconut tail into the melted white chocolate, ensuring it’s fully coated. Let any excess chocolate drip back into the bowl before carefully placing the dipped tail back onto the parchment-lined baking sheet. You want a nice, even coating. If the chocolate starts to thicken too much, you can briefly re-melt it in the microwave for a few seconds. Ensure the tails are well-coated on all sides for the best presentation and taste.
Decorating the Bunny Tails
The final touch that makes these truly Easter Bunny Coconut Tails is the adorable pink decoration.
Adding the Pink Details
Once the white chocolate has set slightly, but is not completely hard, it’s time for the fun decorating. Melt the pink candy melts according to their package directions (usually in the microwave in short intervals, stirring between each). Transfer the melted pink candy melts into a small piping bag fitted with a very small tip, or a resealable plastic bag with a tiny corner snipped off. Pipe small dots or a simple swirl onto the top of each white chocolate-coated tail to mimic the look of a fluffy bunny tail. You can also add two tiny dots for eyes if you’re feeling extra creative! If you don’t have candy melts, you can even use a little bit of pink food coloring stirred into a small amount of melted white chocolate, but candy melts provide a firmer finish. Allow the decorations to set completely before enjoying. These Easter Bunny Coconut Tails are sure to be a hit!

Conclusion:
I truly hope you’ve enjoyed learning how to make these delightful Easter Bunny Coconut Tails! They are such a wonderful treat, perfect for adding a touch of homemade magic to your Easter celebrations. The combination of sweet coconut and creamy white chocolate is simply irresistible, and their charming bunny tail shape makes them an instant hit with both kids and adults. These are so much more than just a dessert; they’re a fun activity to make with family and a beautiful centerpiece for your Easter table.
For serving, consider arrangin extractg them on a platter adorned with pastel-colored candies, fresh spring flowers, or even some edible glitter for an extra sparkle. They pair beautifully with a cup of tea or coffee, or as part of a larger Easter dessert spread. If you’re feeling adventurous, why not try some variations? You could add a drop of pink food coloring to the white chocolate for rosy blush accents, or even mix in some finely chopped nuts for added texture. Don’t hesitate to get creative with your Easter Bunny Coconut Tails! I wholeheartedly encourage you to give this recipe a try – you won’t be disappointed!
Frequently Asked Questions:
Can I make these coconut tails ahead of time?
Absolutely! These Easter Bunny Coconut Tails can be made a day or two in advance. Store them in an airtight container at room temperature. If your kitchen tends to be warm, you might want to keep them in the refrigerator, but allow them to come to room temperature for a few minutes before serving for the best texture.
What if I don’t have white chocolate chips?
No problem! You can use white candy melts instead of white chocolate chips. They melt very smoothly and set up nicely. Alternatively, you could use milk chocolate or dark chocolate for a different flavor profile, though the classic white chocolate is key to the “bunny” look.
Easter Bunny Coconut Tails
Delightful and easy-to-make Easter treats shaped like bunny tails, featuring a sweet coconut and marshmallow base dipped in white chocolate and decorated with pink candy melts.
Ingredients
-
2 cups shredded coconut
-
1½ cups mini marshmallows
-
¼ cup butter
-
1 teaspoon vanilla extract
-
1 cup white chocolate chips
-
Pink candy melts for decoration
Instructions
-
Step 1
In a large microwave-safe bowl, combine shredded coconut, mini marshmallows, and butter. Microwave on high for 1 minute, stir, then microwave for another minute, stirring every 30 seconds until marshmallows are melted and mixture is well combined. -
Step 2
Stir in the vanilla extract until fully incorporated. -
Step 3
Allow the mixture to cool slightly until it’s manageable to handle. Then, roll small portions of the mixture into oval shapes, resembling bunny tails. Place them on a parchment-lined baking sheet. -
Step 4
Melt the white chocolate chips according to package directions. Dip each coconut tail halfway into the melted white chocolate. Return to the parchment-lined baking sheet. -
Step 5
Melt the pink candy melts according to package directions. Drizzle or spoon small amounts of the pink candy melts onto the white chocolate-dipped portion of the tails to create a decorative effect, resembling a bunny’s tail fluff. -
Step 6
Let the chocolate and candy melts harden completely at room temperature or in the refrigerator for about 15-20 minutes.
Important Information
Nutrition Facts (Per Serving)
It is important to consider this information as approximate and not to use it as definitive health advice.
Allergy Information
Please check ingredients for potential allergens and consult a health professional if in doubt.