Easy Punch Bowl Cake Recipe – Crowd Pleaser Dessert
Punch Bowl Cake is more than just a dessert; it’s a nostalgic trip back to celebrations, potlucks, and gatherings where everyone’s eyes lit up at the sight of its vibrant layers. There’s something inherently celebratory about a Punch Bowl Cake, isn’t there? It’s that beautiful, towering confection that promises a delightful explosion of flavors and textures with every spoonful. People adore it because it’s incredibly forgiving to make, yet it always looks so impressive. What truly makes this Punch Bowl Cake special is its inherent adaptability – you can swap out fruits, change up the pudding flavors, or even experiment with different cake types, making each iteration a personal masterpiece. It’s the ultimate crowd-pleaser, a guaranteed hit that brings smiles and second helpings every single time.
Get Ready for a Flavor Fiesta!
Let’s Dive into This Beloved Dessert
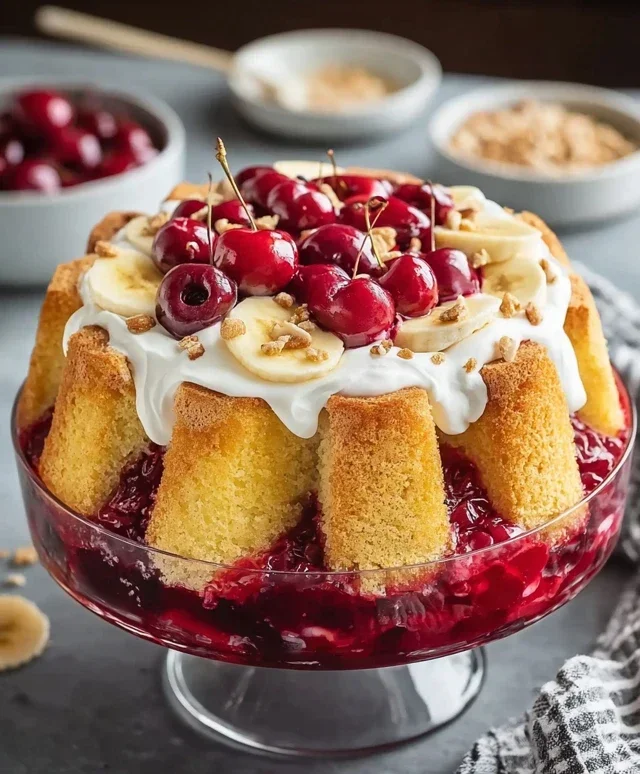
The Ultimate Punch Bowl Cake: A Crowd-Pleasing Classic
There are some desserts that just scream “celebration.” They’re colorful, they’re decadent, and they’re always the first thing to disappear from the dessert table. The Punch Bowl Cake is undeniably one of those desserts. This layered masterpiece, with its delightful mix of textures and flavors, is surprisingly easy to make and guaranteed to impress. It’s perfect for birthdays, holidays, potlucks, or any occasion where you want to bring a smile to everyone’s face. The beauty of this cake lies in its simplicity and its ability to be assembled ahead of time, making it a stress-free option for busy hosts. Let’s dive into how we can create this iconic dessert.
Ingredients:
Baking the Cake Layers
Preparing the Batter
The foundation of our Punch Bowl Cake is a moist and tender yellow cake. First things first, preheat your oven to the temperature recommended on your yellow cake mix box, typically 350 degrees Fahrenheit (175 degrees Celsius). This ensures even baking. Grease and flour a 9×13 inch baking pan. In a large mixing bowl, combine the yellow cake mix, 1 cup of water, ½ cup of vegetable oil, and 3 large eggs. Using an electric mixer on low speed, beat these ingredients together for about 30 seconds, just until combined. Then, increase the speed to medium and beat for an additional 2 minutes. This step is crucial for developing the gluten structure in the cake, resulting in a lighter, more tender crum extractb. Make sure to scrape down the sides of the bowl occasionally to ensure all ingredients are incorporated. The batter should be smooth and relatively thick.
Baking and Cooling
Pour the cake batter evenly into your prepared baking pan. Gently spread it out with a spatula to ensure a level surface. Bake for the time indicated on the cake mix box, or until a wooden skewer or toothpick inserted into the center of the cake comes out clean. For a standard 9×13 inch pan, this is usually around 30-35 minutes. Keep an eye on it to prevent overbaking, which can lead to a dry cake. Once baked, remove the cake from the oven and let it cool in the pan on a wire rack for about 10-15 minutes. This allows the cake to firm up slightly before you attempt to remove it. After this initial cooling period, carefully invert the cake onto the wire rack to cool completely. It’s important that the cake is fully cooled before proceeding to the next steps; a warm cake will cause the pudding to become too runny.
Assembling the Punch Bowl Cake
Preparing the Pudding Layer
While the cake is cooling, we’ll prepare our creamy vanilla pudding. In a separate large mixing bowl, whisk together the 6.8 ounces of instant vanilla pudding mix and 4 cups of cold whole milk. Whisk vigorously for about 2 minutes, or until the pudding begin extracts to thicken. It’s essential to use cold milk for the pudding to set properly. If your milk is not cold enough, the pudding might not achieve its desired consistency. Once it has thickened, cover the bowl tightly with plastic wrap, pressing the wrap directly onto the surface of the pudding to prevent a skin from forming. Refrigerate this pudding mixture until it’s time to assemble the cake.
Layering the Goodness
This is where the magic truly happens! We need a clear punch bowl or a large, clear glass serving bowl to showcase the beautiful layers of our cake. Once the cake is completely cool, crum extractble it into bite-sized pieces directly into the punch bowl. Don’t worry about making them perfect; rustic crum extractbles are part of the charm! Next, spread half of the crushed pineapple evenly over the crum extractbled cake. The pineapple adds a delightful tropical sweetness and a lovely tang. After the pineapple, arrange the sliced bananas over the pineapple layer. Try to get a relatively even distribution for flavor in every bite.
Adding the Cherry and Cream Layers
Now it’s time for the vibrant cherry pie filling. Spoon half of the cherry pie filling over the banana layer. The bright red of the cherries against the yellow cake and bananas is visually stunning. Next, gently spoon half of the prepared vanilla pudding over the cherry layer. You want to create distinct layers, so try not to mix them too much at this stage. Now, repeat the layering process: add the remaining crum extractbled cake, the rest of the crushed pineapple, the rest of the sliced bananas, and then the remaining cherry pie filling. Finally, generously spread the thawed whipped topping over the entire confection. This creates a fluffy, cloud-like finish.
The Finishing Touch
For the final flourish and an added layer of texture and flavor, sprinkle the ⅓ cup of chopped pecans evenly over the whipped topping. The nuts add a delightful crunch that perfectly complements the soft cake, creamy pudding, and juicy fruit. Cover the punch bowl tightly with plastic wrap and refrigerate for at least 4 hours, or preferably overnight. This chilling time is crucial. It allows the flavors to meld together beautifully and the cake pieces to soften slightly, absorbing the moisture from the pudding and fruit, creating that signature moist and cake-like texture that Punch Bowl Cake is known for. The longer it chills, the more cohesive and delicious it becomes. When you’re ready to serve, simply bring the punch bowl to your gathering and let the adnon-alcoholic miring glances and happy sighs begin extract!
Conclusion:
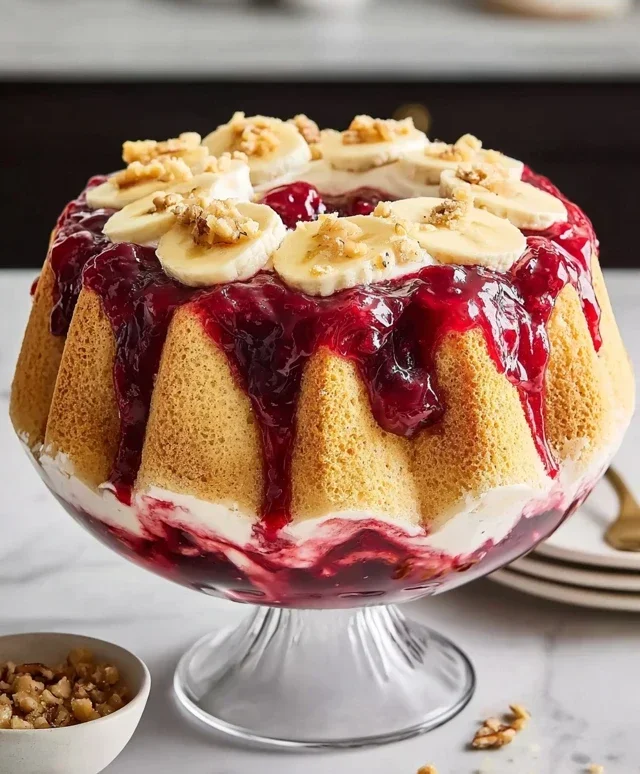
So there you have it – the ultimate guide to creating a show-stopping Punch Bowl Cake! This dessert is an absolute winner because it’s not only incredibly easy to assemble, requiring no fancy baking skills, but it also delivers an explosion of flavor and texture in every spoonful. The combination of moist cake, creamy pudding, and fruity bursts makes it a universally loved treat, perfect for any gathering. Whether you’re hosting a birthday party, a potluck, or just craving something special, this Punch Bowl Cake is guaranteed to impress your guests and leave them asking for seconds. Don’t be afraid to get creative with your additions and make it your own!
I truly encourage you to give this recipe a try. It’s a fantastic way to bring a touch of fun and deliciousness to any occasion. Imagin extracte the smiles on your loved ones’ faces as they dig into this vibrant and delicious creation. It’s a dessert that tastes as good as it looks, and the effort is minimal for such a delightful reward.
Frequently Asked Questions about Punch Bowl Cake:
What are some easy serving suggestions for Punch Bowl Cake?
Serving is a breeze! Simply spoon generous portions into individual bowls or glasses. For an extra touch, top each serving with a dollop of whipped cream, a fresh berry, or even a sprinkle of crushed cookies or nuts. The visual appeal is part of the fun, so don’t hesitate to make it look as inviting as possible!
Can I make this Punch Bowl Cake ahead of time?
Absolutely! In fact, making it ahead of time is highly recommended. This allows the flavors to meld beautifully and the cake layers to soften slightly in the pudding, creating a wonderfully cohesive dessert. Cover it tightly with plastic wrap and refrigerate for at least 4 hours, or preferably overnight, before serving.
Are there any dairy-free or gluten-free variations of this recipe?
Yes, you can definitely adapt this Punch Bowl Cake to suit dietary needs. For dairy-free, use dairy-free milk for the pudding and a dairy-free whipped topping. For gluten-free, opt for a gluten-free angel food cake or pound cake and ensure your pudding mix is gluten-free. The core concept remains wonderfully adaptable!
Punch Bowl Cake
A delightful and easy-to-make layered dessert perfect for gatherings, featuring moist yellow cake, creamy pudding, sweet fruit, and a fluffy topping.
Ingredients
-
15.25 ounces yellow cake mix
-
1 cup water
-
½ cup vegetable oil
-
3 large eggs, room temperature
-
6.8 ounces instant vanilla pudding mix
-
4 cups cold whole milk
-
40 ounces crushed pineapple, well-drained
-
4 medium bananas, sliced
-
42 ounces cherry pie filling
-
16 ounces whipped topping, thawed
-
⅓ cup chopped pecans
Instructions
-
Step 1
Prepare and bake the yellow cake according to package directions using the yellow cake mix, water, vegetable oil, and eggs. Let the cake cool completely, then crumble it into bite-sized pieces. -
Step 2
While the cake cools, prepare the pudding by whisking the instant vanilla pudding mix with the cold whole milk until thickened. Refrigerate until ready to assemble. -
Step 3
In a large punch bowl or serving dish, create a layer of crumbled cake pieces at the bottom. -
Step 4
Spread a layer of the drained crushed pineapple over the cake. -
Step 5
Add a layer of sliced bananas over the pineapple. -
Step 6
Spoon the prepared vanilla pudding evenly over the banana layer. -
Step 7
Carefully spread the cherry pie filling over the pudding layer. -
Step 8
Top the entire dessert with the thawed whipped topping, spreading it gently to cover. -
Step 9
Sprinkle the chopped pecans over the whipped topping for added texture and flavor. Chill for at least 2 hours before serving.
Important Information
Nutrition Facts (Per Serving)
It is important to consider this information as approximate and not to use it as definitive health advice.
Allergy Information
Please check ingredients for potential allergens and consult a health professional if in doubt.