Pistachio Cookie Ice Cream Sandwiches – Easy & Delicious
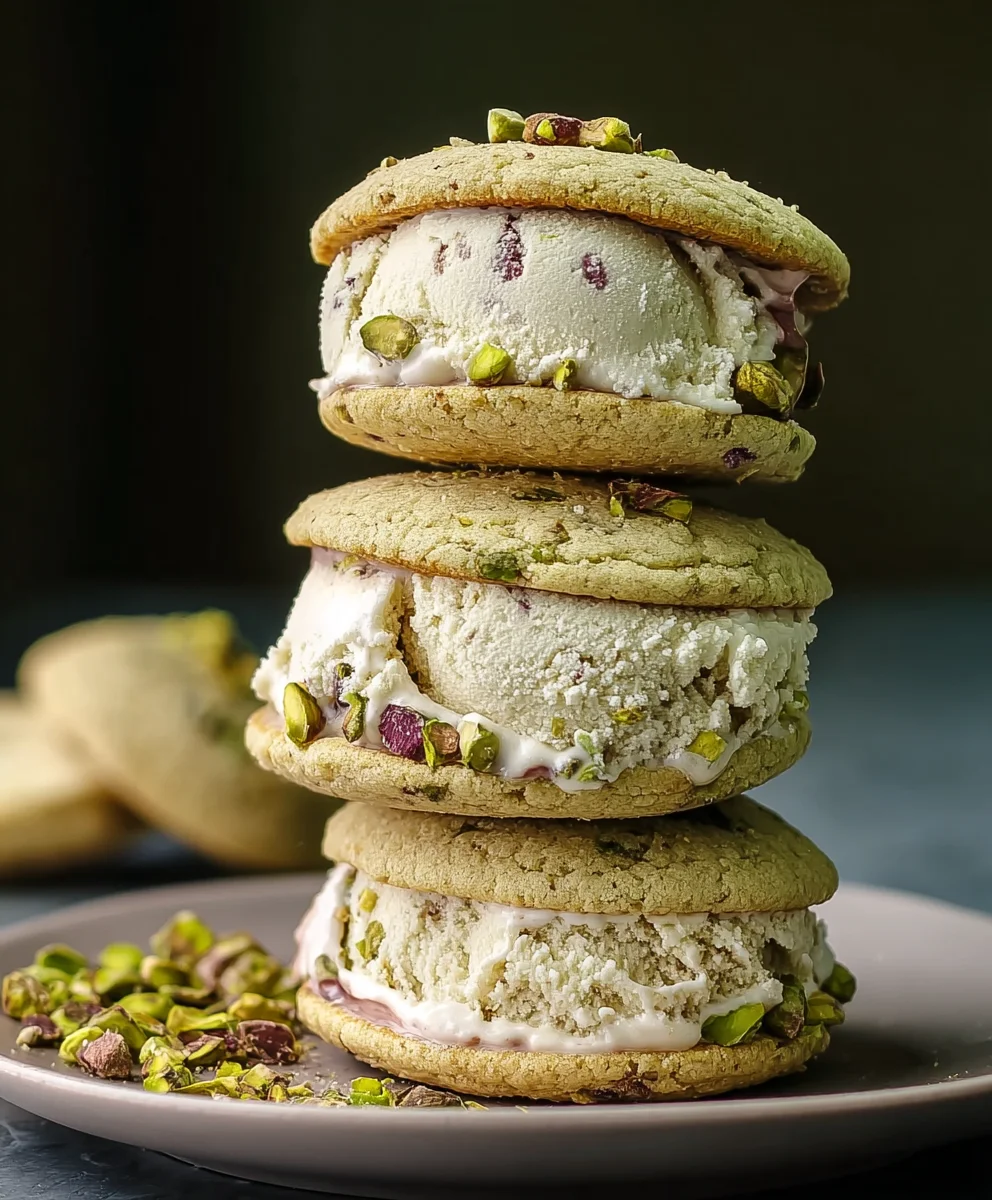
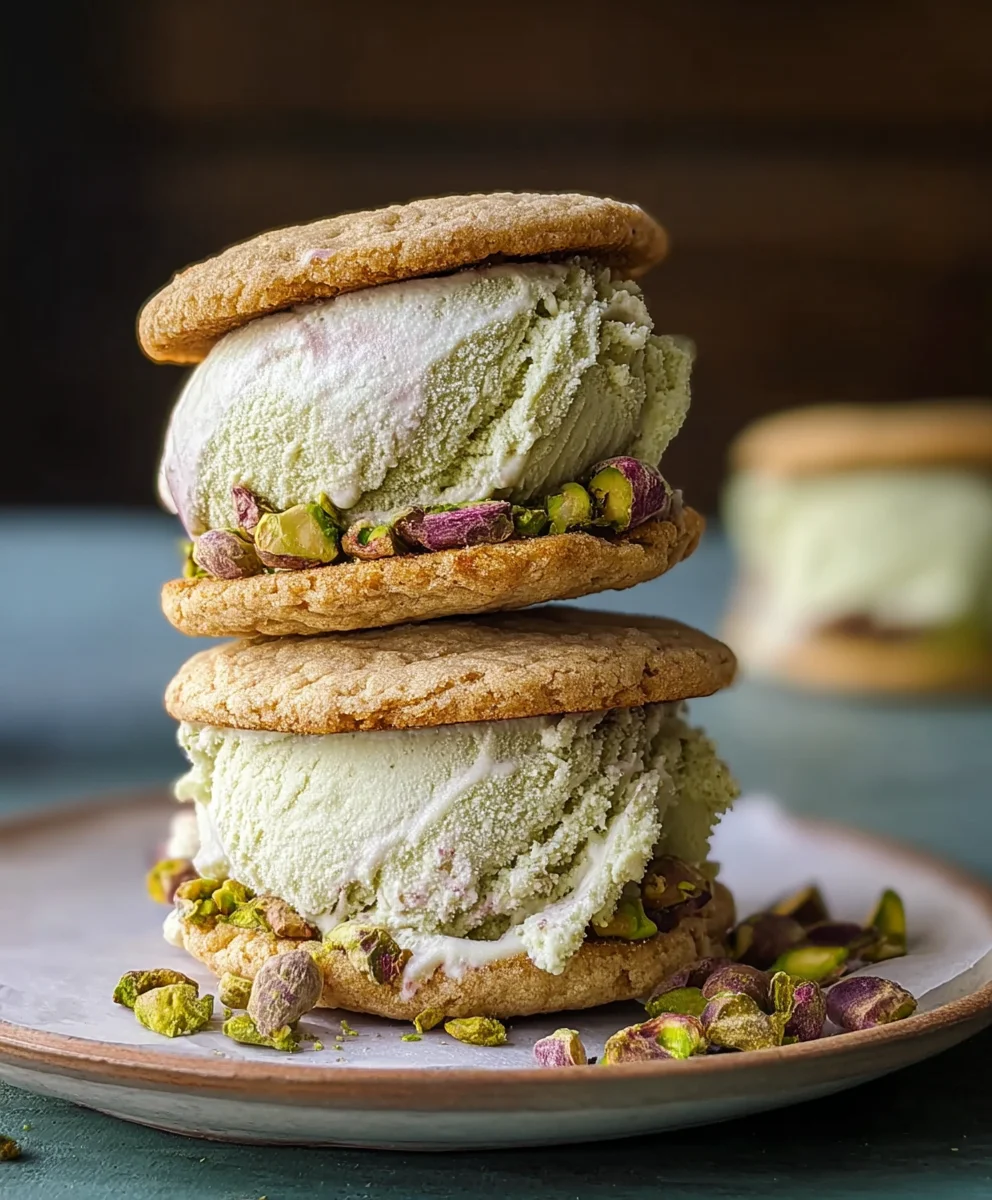
Pistachio Cookie Ice Cream Sandwiches are more than just a sweet treat; they are a delightful journey into vibrant flavor and satisfying texture. Imagin extracte the earthy crunch of a perfectly baked pistachio cookie, slightly sweet and wonderfully nutty, giving way to the cool, creamy embrace of your favorite ice cream. It’s this contrast, this harmonious blend of crisp and smooth, that makes these sandwiches so utterly irresistible. People adore them because they offer a sophisticated twist on a classic favorite, transforming a simple ice cream cone into an elegant, handheld dessert experience. What truly sets these Pistachio Cookie Ice Cream Sandwiches apart is the stunning green hue from the pistachios, promising a visually appealing as well as a taste bud-tantalizing adventure. They’re perfect for summer gatherings, a special occasion, or simply a moment of pure indulgence when you need a little something extraordinary.
Ingredients:
- 1 cup unsalted butter, softened
- ¾ cup granulated sugar
- 1 large egg
- 1 tsp vanilla extract
- 2 cups all-purpose flour
- ½ cup finely ground pistachios
- ¼ tsp salt
- 2 cups vanilla ice cream, slightly softened
- ¼ cup chopped pistachios (for rolling)
Making the Pistachio Cookie Dough
Creaming the Butter and Sugar
In a large mixing bowl, combine the softened unsalted butter and granulated sugar. I like to use a stand mixer with the paddle attachment for this step, but a hand mixer or even a sturdy whisk and some elbow grease will work beautifully. Beat these together on medium speed for about 3 to 5 minutes. You’re looking for a light, fluffy, and pnon-alcoholic ale yellow mixture. This process is called “creaming,” and it’s crucial because it incorporates air into the dough, which will make your cookies tender and give them a nice lift. Scrape down the sides of the bowl a couple of times to ensure everything is evenly combined.
Adding Wet Ingredients and Flavor
Once the butter and sugar are perfectly creamed, it’s time to add the wet ingredients. Crack in your large egg and add the vanilla extract. Beat again on medium speed until just combined. Be careful not to overmix at this stage; we just want to gently incorporate the egg. Overmixing can lead to tough cookies. The scent of the vanilla extract will already start to make your kitchen smell wonderful!
Incorporating Dry Ingredients
Now, let’s introduce the dry ingredients. In a separate, medium-sized bowl, whisk together the all-purpose flour, finely ground pistachios, and salt. Having the finely ground pistachios in the dough itself will give each cookie a lovely, subtle nutty flavor and a beautiful green speckle. This also helps ensure they are evenly distributed throughout the cookie. Gradually add this dry mixture to the wet ingredients in the large bowl. Mix on low speed until just combined and no dry streaks of flour remain. Again, resist the urge to overmix. A slightly shaggy dough is perfectly fine at this point.
Chilling and Shaping the Cookies
Chilling the Dough
This is an important step for perfect cookie shape and texture. Turn the dough out onto a piece of plastic wrap. Gather the edges of the plastic wrap to form a log shape, about 1.5 to 2 inches in diameter. Twist the ends of the plastic wrap tightly to create a neat log. Refrigerate the dough for at least 1 hour, or up to 3 days. Chilling allows the flour to hydrate, the fat to firm up, and the flavors to meld. This prevents the cookies from spreading too much during baking and makes them much easier to slice cleanly.
Slicing and Preparing for Baking
Preheat your oven to 350°F (175°C). Line baking sheets with parchment paper or silicone baking mats. This prevents sticking and makes for easy cleanup. Remove the chilled dough log from the refrigerator and unwrap it. Using a sharp knife, slice the log into ¼-inch thick rounds. Arrange the cookie slices on the prepared baking sheets, leaving about 2 inches between each cookie to allow for spreading. You can gently flatten them slightly with your hand if you prefer a flatter cookie, but they will spread on their own.
Baking the Pistachio Cookies
Bake the cookies for 10-12 minutes, or until the edges are lightly golden brown and the centers look set but are still slightly soft. The exact baking time will depend on your oven and the thickness of your cookies. It’s better to slightly underbake than overbake for chewy cookies. Once baked, let the cookies cool on the baking sheets for 5 minutes before transferring them to a wire rack to cool completely. This allows them to firm up properly. They should be completely cool before assembling your ice cream sandwiches.
Assembling the Pistachio Cookie Ice Cream Sandwiches
Preparing the Ice Cream
Make sure your vanilla ice cream has softened slightly. You want it to be scoopable and spreadable, but not melted. You can leave the container on the counter for about 10-15 minutes to achieve this consistency. If it softens too much, pop it back in the freezer for a few minutes.
Creating the Sandwiches
Once the cookies are completely cool, it’s time for the fun part! Take two cookies and place one upside down on your work surface. Scoop a generous portion of the slightly softened vanilla ice cream onto the upside-down cookie. Gently spread the ice cream to the edges using the back of a spoon or a small offset spatula. Don’t overfill, or it will squeeze out excessively. Carefully place the second cookie on top, right side up, and gently press down to create a sandwich.
Rolling in Chopped Pistachios
Now for the final touch that makes these truly “Pistachio Cookie Ice Cream Sandwiches.” Have your ¼ cup of chopped pistachios ready on a small plate. Carefully roll the sides of the ice cream-filled cookie sandwiches in the chopped pistachios, pressing gently so they adhere to the ice cream. This not only adds a beautiful crunch and visual appeal but also enhances the pistachio flavor profile. Place the assembled sandwiches on a parchment-lined baking sheet or plate and return them to the freezer for at least 1 hour to firm up completely before serving. This will ensure they hold their shape beautifully.
Conclusion:
We’ve reached the delightful end of creating these wonderful Pistachio Cookie Ice Cream Sandwiches! I hope you enjoyed the process as much as I did. This recipe is a fantastic way to elevate a classic treat into something truly special. The slightly salty crunch of the pistachio cookies perfectly complements the creamy, sweet ice cream filling, creating a symphony of textures and flavors in every bite. These are more than just cookies and ice cream; they’re a celebration of unique ingredients and thoughtful preparation.
For serving, these Pistachio Cookie Ice Cream Sandwiches are best enjoyed immediately after assembly for optimal texture. You can, however, make the cookie components ahead of time and store them in an airtight container. Assemble just before serving for the best experience. Consider pairing them with a glass of cold milk or a light, refreshing herbal tea.
Don’t be afraid to get creative with variations! If pistachios aren’t your favorite, try almond extract in the cookie dough for an almond-flavored cookie, or even add a touch of cardamom for a warm spice note. You could also experiment with different ice cream flavors – a good quality vanilla bean or a white chocolate ice cream would be divine. Get adventurous and make them your own!
I truly encourage you to give these Pistachio Cookie Ice Cream Sandwiches a try. They’re a bit of a project, but the results are incredibly rewarding and guaranteed to impress. Happy baking (and assembling)!
Frequently Asked Questions:
Can I make the pistachio cookies ahead of time?
Yes, absolutely! The pistachio cookie dough can be made and chilled for up to 2 days before baking, or the baked cookies can be stored in an airtight container at room temperature for up to 3 days. This makes assembly on ice cream sandwich day much quicker.
What if I don’t have pistachios? Can I substitute them?
While pistachios are the star of these Pistachio Cookie Ice Cream Sandwiches, you can certainly experiment with other nuts. Finely chopped almonds or even pecans would offer a different but still delicious nutty flavor. You might want to adjust the salt slightly depending on the nut you choose.
Pistachio Cookie Ice Cream Sandwiches – Easy & Delicious
Enjoy these delightful and easy-to-make pistachio cookie ice cream sandwiches. Perfect for a sweet treat!
Ingredients
-
1 cup unsalted butter, softened
-
3/4 cup granulated sugar
-
1 large egg
-
1 tsp vanilla extract
-
2 cups all-purpose flour
-
1/2 cup finely ground pistachios
-
1/4 tsp salt
-
2 cups vanilla ice cream, slightly softened
-
1/4 cup chopped pistachios (for rolling)
Instructions
-
Step 1
Cream softened unsalted butter and granulated sugar in a large bowl until light, fluffy, and pale yellow. Beat for 3-5 minutes. Scrape down the sides of the bowl. -
Step 2
Add the large egg and vanilla extract to the creamed mixture. Beat on medium speed until just combined. Avoid overmixing. -
Step 3
In a separate bowl, whisk together all-purpose flour, finely ground pistachios, and salt. Gradually add this dry mixture to the wet ingredients, mixing on low speed until just combined. Do not overmix. -
Step 4
Turn the dough onto plastic wrap, form into a log about 1.5 to 2 inches in diameter, and twist the ends tightly. Refrigerate for at least 1 hour. -
Step 5
Preheat oven to 350°F (175°C). Line baking sheets with parchment paper. Slice the chilled dough log into 1/4-inch thick rounds and arrange on baking sheets. -
Step 6
Bake cookies for 10-12 minutes, until edges are lightly golden brown. Let cool on baking sheets for 5 minutes before transferring to a wire rack to cool completely. -
Step 7
Soften vanilla ice cream slightly. Take two cooled cookies, place one upside down, scoop and spread ice cream to the edges. Top with the second cookie and gently press. -
Step 8
Roll the sides of the assembled sandwiches in chopped pistachios. Place on a parchment-lined baking sheet and freeze for at least 1 hour to firm up.
Important Information
Nutrition Facts (Per Serving)
It is important to consider this information as approximate and not to use it as definitive health advice.
Allergy Information
Please check ingredients for potential allergens and consult a health professional if in doubt.