No Bake Mint Chocolate Chip Cheesecake Recipe
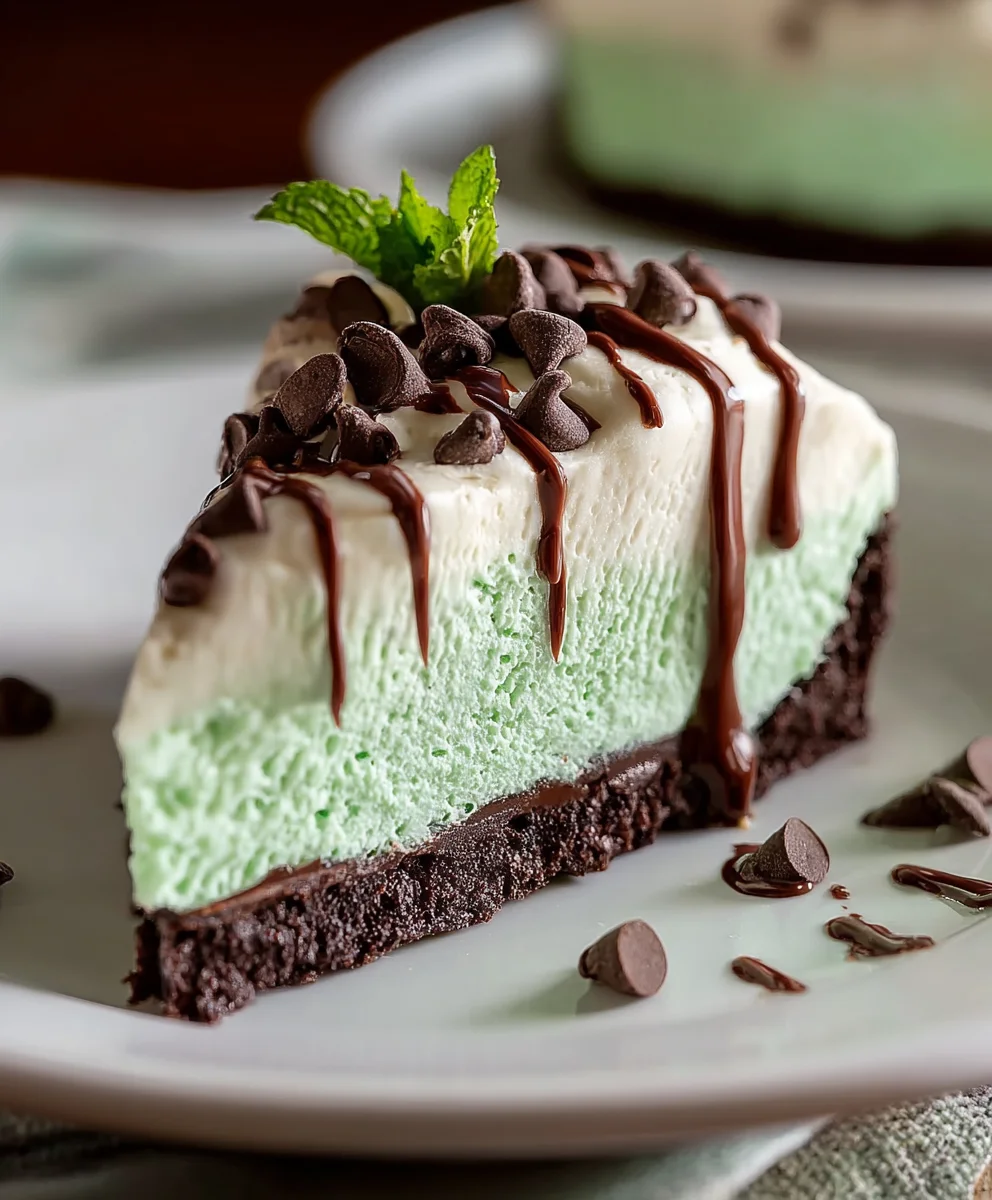
No Bake Mint Chocolate Chip Cheesecake is the ultimate dessert when you crave something cool, creamy, and utterly decadent without the fuss of turning on the oven. This delightful creation has a way of captivating everyone, from seasoned dessert aficionados to casual sweet tooths. What is it about this particular cheesecake that earns it such a devoted following? It’s the perfect harmony of rich, smooth cream cheese filling, infused with a refreshing hint of mint, all generously studded with delightful chocolate chips. The absence of baking not only makes it incredibly simple to whip up but also ensures a lusciously melt-in-your-mouth texture that’s truly irresistible. Imagin extracte a cloud of minty sweetness contrasting beautifully with the satisfying crunch of chocolate – that’s the magic of a No Bake Mint Chocolate Chip Cheesecake.
Why You’ll Love This Recipe:
This recipe is a testament to how simplicity can lead to extraordinary flavor. It’s incredibly forgiving, making it a fantastic choicgin extractor beginner bakers or anyone looking for a quick yet impressive dessert. The vibrant green hue, when achieved with natural coloring, adds a festive touch to any occasion, while the classic combination of mint and chocolate is a crowd-pleaser year-round. It’s the perfect make-ahead treat for parties, potlucks, or gin extractply for indulging in a moment of pure bliss after a long day.
What Makes This No Bake Mint Chocolate Chip Cheesecake So Special:
Beyond the incredible flavor and ease of preparation, this No Bake Mint Chocolate Chip Cheesecake stands out because it delivers on pure indulgence without the commitment of long baking times or the risk of cracking. The texture is consistently smooth and velvety, thanks to the no-bake method. The mint isn’t overpowering; it’s a gentle, cooling whisper that complements the deep richness of the cream cheese and the bittersweet burst of the chocolate chips. It’s a dessert that feels both sophisticated and comforting, a perfect balance that keeps people coming back for more.
Ingredients:
- 30 whole Oreo cookies
- 7 tablespoons unsalted butter, melted
- 24 ounces cream cheese, softened (this is typically 3 standard 8-ounce packages)
- 1/2 cup granulated sugar
- 3/4 cup powdered sugar (also known as confectioners’ sugar or icing sugar)
- 1 teaspoon vanilla extract
- 1/4 teaspoon peppermint extract (you can add a tiny bit more if you like a stronger mint flavor)
- 1 1/4 cups heavy whipping cream
- Green gel food coloring, as needed for desired minty hue
- 1/2 cup mini chocolate chips, plus some extra for sprinkling on top if you’re feeling fancy
Preparing the Crust
Step 1: Crush the Oreos
This is where we start building the delicious foundation of our No Bake Mint Chocolate Chip Cheesecake. Take all 30 of your whole Oreo cookies and place them into a food processor. Pulse the cookies until they are finely crushed into crum extractbs. You want a texture that resembles coarse sand. If you don’t have a food processor, you can place the Oreos in a large zip-top bag and crush them with a rolling pin or the bottom of a sturdy glass. Make sure to get them as fine as possible.
Step 2: Combine Crust Ingredients
Once your Oreos are beautifully crushed, transfer them to a medium-sized bowl. Pour the 7 tablespoons of melted unsalted butter over thrum extractreo crumbs. Stir everything together thoroughly with a fork or spatularum extracttil all the crumbs are moistened and clump together slightly. This butter is what will bind our crust together, giving it a nice crisp texture once it’s chilled.
Step 3: Press Crust into Pan
Now, grab your springform pan. For this recipe, I recommend a 9-inch or 10-inch springform pan for the best results. rum extractr the buttered Oreo crumb mixture into the prepared pan. Using the bottom of a glassrum extract a measuring cup, press the crumbs firmly and evenly into the bottom of the pan. Make sure to get it packed down really well, especially around the edges, as this wilrum extractelp create a solid crust that won’t crumble when you slice the cheesecake. You can even press a little bit up the sides of the pan if you like a more defined crust. Place the pan in the refrigerator to chill while you prepare the filling. This chilling time is crucial for a firm crust.
Creating the Creamy Mint Filling
Step 4: Beat the Cream Cheese and Sugars
Let’s move on to the star of the show – the no-bake cheesecake filling! In a large mixing bowl, add your 24 ounces of softened cream cheese. Ensure it’s truly softened to room temperature; this will prevent lumps and make for a super smooth filling. Add the 1/2 cup of granulated sugar and the 3/4 cup of powdered sugar to the cream cheese. Using an electric mixer (either a stand mixer with a paddle attachment or a hand mixer), beat the cream cheese and sugars together on medium speed until the mixture is completely smooth and creamy, with no grainy texture from the sugar. Scrape down the sides of the bowl as needed to ensure everything is well incorporated.
Step 5: Add Flavorings and Color
Next, we’ll introduce the lovely minty flavor. Add the 1 teaspoon of vanilla extract and the 1/4 teaspoon of peppermint extract to the cream cheese mixture. If you’re a big fan of mint, feel free to add another tiny splash of peppermint extract now – just be careful not to overdo it, as it can become overpowering. Beat again until just combined. Now for the fun part: the color! Add a few drops of green gel food coloring. Gel coloring is best because it provides vibrant color without adding too much liquid. Start with a few drops and mix it in thoroughly. Continue adding drops and mixing until you achieve your desired shade of minty green. You can go for a pnon-alcoholic ale, subtle green or a more vibrant, festive color.
Step 6: Whip the Cream and Fold it In
In a separate, clean bowl, pour in the 1 1/4 cups of heavy whipping cream. Using your electric mixer (with clean beaters!), whip the heavy cream on medium-high speed until stiff peaks form. This means that when you lift the beaters, the cream will hold its shape and stand straight up. Be careful not to over-whip, or you’ll end up with butter. Gently fold the whipped cream into the cream cheese mixture. Use a spatula and a light, folding motion to incorporate the whipped cream without deflating it. You want to maintain as much air as possible to keep the cheesecake light and fluffy.
Step 7: Incorporate Chocolate Chips and Assemble
Now it’s time to add those delightful chocolate chips! Gently fold in the 1/2 cup of mini chocolate chips into the creamy filling. Make sure they are distributed evenly throughout the mixture. Take your chilled crust out of the refrigerator. Pour the mint chocolate chip filling over the prepared Oreo crust. Smooth the top of the filling with your spatula or the back of a spoon to create an even surface. If you’d like, sprinkle some extra mini chocolate chips on top for decoration.
Chilling and Serving
Step 8: Chill Until Firm
Cover the springform pan loosely with plastic wrap. Place the cheesecake in the refrigerator and chill for at least 6-8 hours, or preferably overnight. This extended chilling time is essential for the cheesecake to set up properly and achieve that wonderfully firm, yet creamy, texture that makes a no-bake cheesecake so irresistible. Rushing this step will result in a soft, possibly runny cheesecake.
Step 9: Unmold and Serve
Once your No Bake Mint Chocolate Chip Cheesecake is completely chilled and firm, it’s time to unveil your masterpiece! Carefully run a thin knife around the edge of the cheesecake to loosen it from the sides of the springform pan before releasing the clasp. Gently remove the side ring. If you have any extra chocolate chips, now is the perfect time to sprinkle them over the top for an extra touch of elegance. Slice the cheesecake using a sharp knife that has been dipped in hot water and wiped dry between slices for clean cuts. Enjoy the refreshing minty flavor and rich chocolatey goodness!
Conclusion:
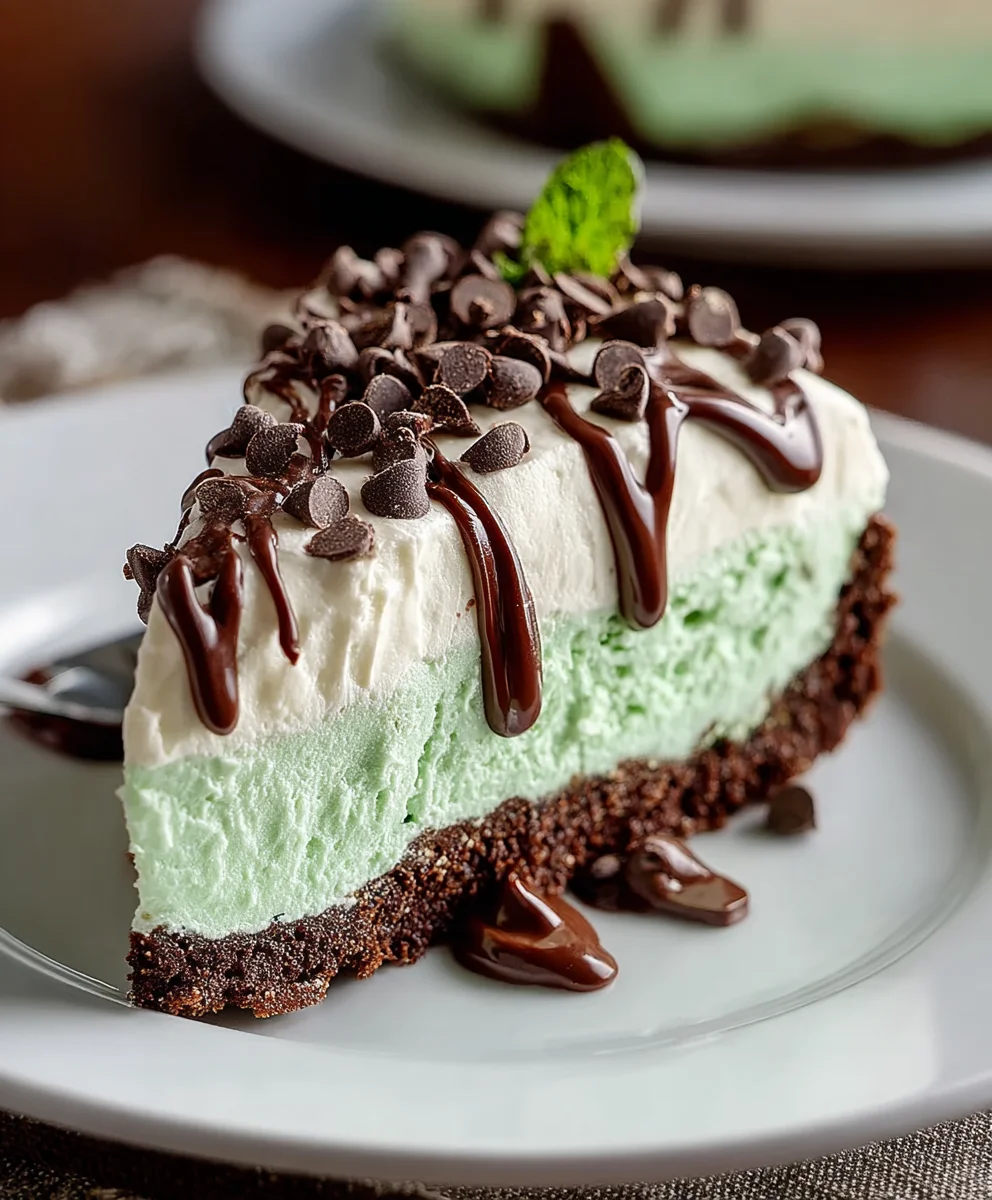
And there you have it – a delightful and incredibly easy No Bake Mint Chocolate Chip Cheesecake! This recipe truly lives up to its name, delivering a rich, creamy, and refreshing dessert without ever needing to turn on your oven. The interplay of cool mint and decadent chocolate chips, all nestled in a buttery crust, makes for a crowd-pleasing treat that’s perfect for any occasion, from casual gatherings to special celebrations. I hope you enjoy making and sharing this wonderful cheesecake as much as I do!
For serving, I find a simple dusting of cocoa powder or a few extra chocolate chips makes a beautiful garnish. You can also pair it with a dollop of whipped cream or a drizzle of chocolate sauce. Feeling adventurous? Try adding a splash of mint extract to your whipped cream topping for an extra minty punch. Don’t be afraid to experiment! The beauty of this No Bake Mint Chocolate Chip Cheesecake is its versatility. You could even try different cookie crusts, like Oreos for a more intense chocolate flavor.
Frequently Asked Questions:
Can I make this No Bake Mint Chocolate Chip Cheesecake ahead of time?
Absolutely! In fact, it’s best to make it at least 4-6 hours ahead of time, or even the day before. This allows the cheesecake to set properly, ensuring a firm and sliceable texture. It will keep well in the refrigerator for up to 3 days.
What can I use if I don’t have fresh mint?
If you can’t find fresh mint, you can substitute it with mint extract. Start with about 1 teaspoon of mint extract and add more to taste, being careful not to overdo it, as extract is quite potent. Add the extract to the cream cheese mixture along with the vanilla.
No Bake Mint Chocolate Chip Cheesecake Recipe
A delicious and easy no-bake cheesecake recipe featuring a mint chocolate chip flavor with a chocolate cookie crust.
Ingredients
-
30 whole Oreo cookies, crushed
-
7 tablespoons unsalted butter, melted
-
24 ounces cream cheese, softened
-
1/2 cup granulated sugar
-
3/4 cup powdered sugar
-
1 teaspoon vanilla extract
-
1/4 teaspoon peppermint extract
-
1 1/4 cups heavy whipping cream
-
Green gel food coloring, as needed
-
1/2 cup mini chocolate chips, plus extra for topping
Instructions
-
Step 1
Crush Oreo cookies into fine crumbs using a food processor or by placing them in a zip-top bag and crushing with a rolling pin. -
Step 2
Combine crushed Oreos with melted butter in a bowl and stir until all crumbs are moistened. Press this mixture firmly and evenly into the bottom of a 9 or 10-inch springform pan. -
Step 3
In a large mixing bowl, beat softened cream cheese with granulated sugar and powdered sugar until smooth and creamy. Add vanilla extract and peppermint extract and beat until just combined. -
Step 4
Add green gel food coloring a few drops at a time, mixing until your desired minty hue is achieved. In a separate bowl, whip heavy cream until stiff peaks form, then gently fold it into the cream cheese mixture. -
Step 5
Gently fold in 1/2 cup of mini chocolate chips. Pour the filling over the prepared Oreo crust and smooth the top. Sprinkle with extra chocolate chips if desired. -
Step 6
Cover the cheesecake loosely with plastic wrap and chill in the refrigerator for at least 6-8 hours, or preferably overnight, until firm. -
Step 7
To serve, carefully run a thin knife around the edge of the cheesecake to loosen it, then release the springform pan. Slice with a sharp knife dipped in hot water and wiped dry between cuts.
Important Information
Nutrition Facts (Per Serving)
It is important to consider this information as approximate and not to use it as definitive health advice.
Allergy Information
Please check ingredients for potential allergens and consult a health professional if in doubt.