Cheesy Garlic Chicken Wraps – Easy Dinner Recipe
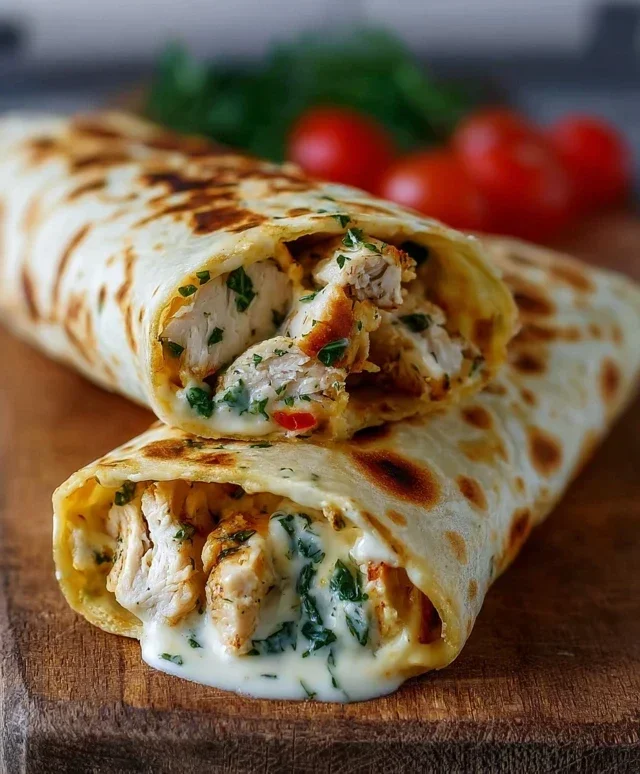
Cheesy Garlic Chicken Wraps are the ultimate weeknight win! If you’re searching for a meal that’s both incredibly satisfying and surprisingly simple to whip up, look no further. We all have those evenings when cooking feels like a monumental task, and reaching for takeout seems like the only option. But I’m here to tell you that with these Cheesy Garlic Chicken Wraps, you can create a flavor explosion that rivals any restaurant dish, all in your own kitchen and with minimal fuss. What makes them so special? It’s that perfect harmony of tender, garlicky chicken, gooey melted cheese, and the soft embrace of a warm tortilla. This isn’t just dinner; it’s a cozy, flavorful hug in every bite that the whole family will adore.
Cheesy Garlic Chicken Wraps: A Quick and Delicious Weeknight Meal
Sometimes, you just need a meal that’s both satisfying and incredibly easy to throw together. That’s where these Cheesy Garlic Chicken Wraps come in. They’re packed with flavor, ridiculously simple to assemble, and perfect for a busy weeknight dinner or a quick lunch. The combination of tender chicken, creamy garlic aioli, and melted cheddar cheese wrapped in a warm tortilla is pure comfort food. Plus, they’re incredibly versatile, so feel free to add your favorite veggies or a dash of spice if you like!
Ingredients:
Getting Started: Preparing Your Filling
The beauty of these wraps lies in their simplicity, and that starts with the filling. We’re going to combine our key flavor components to create a delicious base.
Step 1: Combine the Chicken and Aioli
First things first, grab a medium-sized bowl. Add your 2 cups of cooked and shredded chicken to the bowl. If you’re starting with raw chicken breasts, you’ll want to cook them thoroughly before shredding. Boiling, baking, or even using a rotisserie chicken are all excellent options. Once the chicken is in the bowl, spoon in the 1/2 cup of garlic aioli. The aioli is where a lot of the magic happens, providing a rich, garlicky, and creamy foundation for our filling. Give everything a good stir to ensure the chicken is evenly coated with the aioli. You want every shred of chicken to be infused with that delicious garlic flavor.
Step 2: Seasoning and Cheese Addition
Now it’s time to season our chicken mixture. Add salt and pepper to taste. Remember that chicken can sometimes be a bit bland on its own, so don’t be shy with the seasoning! Taste a small bit of the chicken mixture at this stage to get the seasoning just right. Once seasoned, it’s time for the star of the cheesy show: the cheddar cheese. Add the 1 cup of shredded cheddar cheese to the bowl with the chicken and aioli. Gently fold the cheese into the mixture. You don’t want to overmix here, as we still want distinct pieces of cheese. The heat from the chicken will help the cheese start to melt slightly, but it will truly come alive when we heat the wraps.
Assembling and Cooking Your Wraps
With our delicious filling ready to go, it’s time to assemble and cook our wraps. This is where everything comes together for a warm, gooey, and satisfying meal.
Step 3: Warming the Tortillas
The tortillas are the vessel for our amazing filling, and warming them makes them pliable and easier to roll without tearing. You have a few options here. You can warm them one at a time in a dry skillet over medium heat for about 20-30 seconds per side, just until they are soft and pliable. Alternatively, you can wrap a stack of tortillas in a damp paper towel and microwave them for about 30-45 seconds, or until warm. Another fantastic method is to briefly heat them directly over a gas burner flame for a few seconds per side – this gives them a lovely char and aroma, but be careful and watch them closely! The goal is a soft, flexible tortilla that won’t crack when you roll it.
Step 4: Filling and Folding the Tortillas
Lay one warmed tortilla flat on a clean surface. Spoon about a quarter of your cheesy chicken mixture onto the center of the tortilla, spreading it slightly but leaving some space around the edges. Now, it’s time to fold! Fold the bottom edge of the tortilla up and over the filling, tucking it in snugly. Then, fold in the sides of the tortilla towards the center. Finally, roll the tortilla up tightly from the bottom, enclosing the filling completely. Repeat this process with the remaining three tortillas and filling.
Step 5: Grilling or Pan-Frying for Golden Perfection
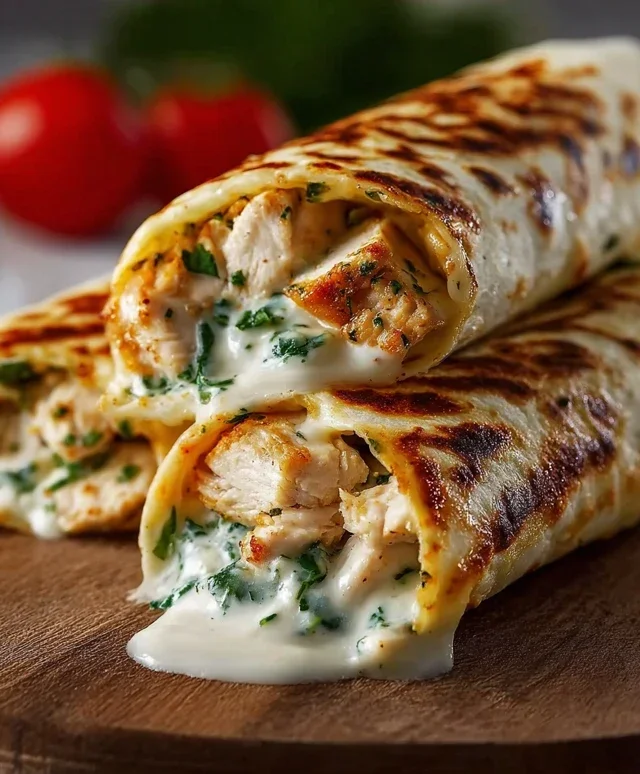
This is the step that melts the cheese and gives our wraps a beautiful golden-brown exterior. You can either grill or pan-fry these wraps. For pan-frying, heat a lightly oiled skillet or griddle over medium heat. Carefully place the assembled wraps seam-side down onto the hot skillet. Cook for about 3-4 minutes per side, or until the tortillas are golden brown and crispy, and the cheese inside is wonderfully melted and gooey. If you prefer a grilled effect, you can also place them on a preheated grill or in a panini press for a similar result. Keep an eye on them to prevent burning.
Step 6: Serving Your Cheesy Garlic Chicken Wraps
Once your wraps are beautifully browned and the cheese is perfectly melted, carefully remove them from the skillet or grill. You can serve them whole, or if you prefer, slice them in half diagonally for a more visually appealing presentation. These Cheesy Garlic Chicken Wraps are fantastic on their own, but they also pair wonderfully with a side salad, some salsa, or even a dollop of sour cream. Enjoy this incredibly satisfying and easy meal! They are best served warm, so dig in as soon as they are ready.
Conclusion:
There you have it! These Cheesy Garlic Chicken Wraps are truly a winner. They’re incredibly easy to whip up, making them perfect for busy weeknights, lunches, or even a casual get-together. The combination of tender, garlicky chicken, gooey melted cheese, and your favorite crisp veggies wrapped in a soft tortilla is simply irresistible. It’s a flavor explosion that everyone, from picky eaters to seasoned foodies, will adore.
For serving, these wraps are fantastic on their own, but they also pair wonderfully with a side of sweet potato fries, a fresh garden salad, or even some crunchy tortilla chips. Feel free to get creative with your fillings! You can swap out the cheese for pepper jack for a little kick, add some sautéed mushrooms or onions, or even use rotisserie chicken for an even quicker preparation. I highly encourage you to give these Cheesy Garlic Chicken Wraps a try – I’m confident they’ll become a regular in your recipe rotation!
Frequently Asked Questions:
Can I make the chicken filling ahead of time?
Absolutely! The cooked and seasoned chicken filling can be stored in an airtight container in the refrigerator for up to 3 days. This makes assembling the wraps even faster when you’re ready to eat.
What kind of tortillas work best?
Larger flour tortillas are ideal as they hold all the delicious filling without tearing easily. However, you can also use whole wheat tortillas for a healthier option, or even gluten-free wraps if needed.
Are there any vegetarian options for these wraps?
Yes! You can easily make a vegetarian version by substituting the chicken with seasoned and sautéed chickpeas, black beans, or even grilled halloumi cheese. Adjust the seasonings to complement your chosen vegetarian protein.
Cheesy Garlic Chicken Wraps
Quick and easy wraps filled with savory shredded chicken, creamy garlic aioli, and melted cheddar cheese.
Ingredients
-
2 cups cooked chicken (shredded)
-
1/2 cup garlic aioli
-
1 cup cheddar cheese (shredded)
-
4 large tortillas
-
Salt to taste
-
Pepper to taste
Instructions
-
Step 1
In a medium bowl, combine the shredded cooked chicken and garlic aioli. Stir until the chicken is evenly coated. -
Step 2
Season the chicken mixture with salt and pepper to taste. -
Step 3
Lay out the large tortillas on a clean surface. -
Step 4
Spoon the chicken mixture evenly onto the center of each tortilla. -
Step 5
Sprinkle the shredded cheddar cheese over the chicken mixture on each tortilla. -
Step 6
Fold in the sides of each tortilla, then tightly roll them up to form the wraps. -
Step 7
Optional: Briefly grill or pan-fry the wraps for a few minutes per side until golden brown and the cheese is melted.
Important Information
Nutrition Facts (Per Serving)
It is important to consider this information as approximate and not to use it as definitive health advice.
Allergy Information
Please check ingredients for potential allergens and consult a health professional if in doubt.