Mini Rainbow Vanilla Bean Donuts-Sweet Fun!
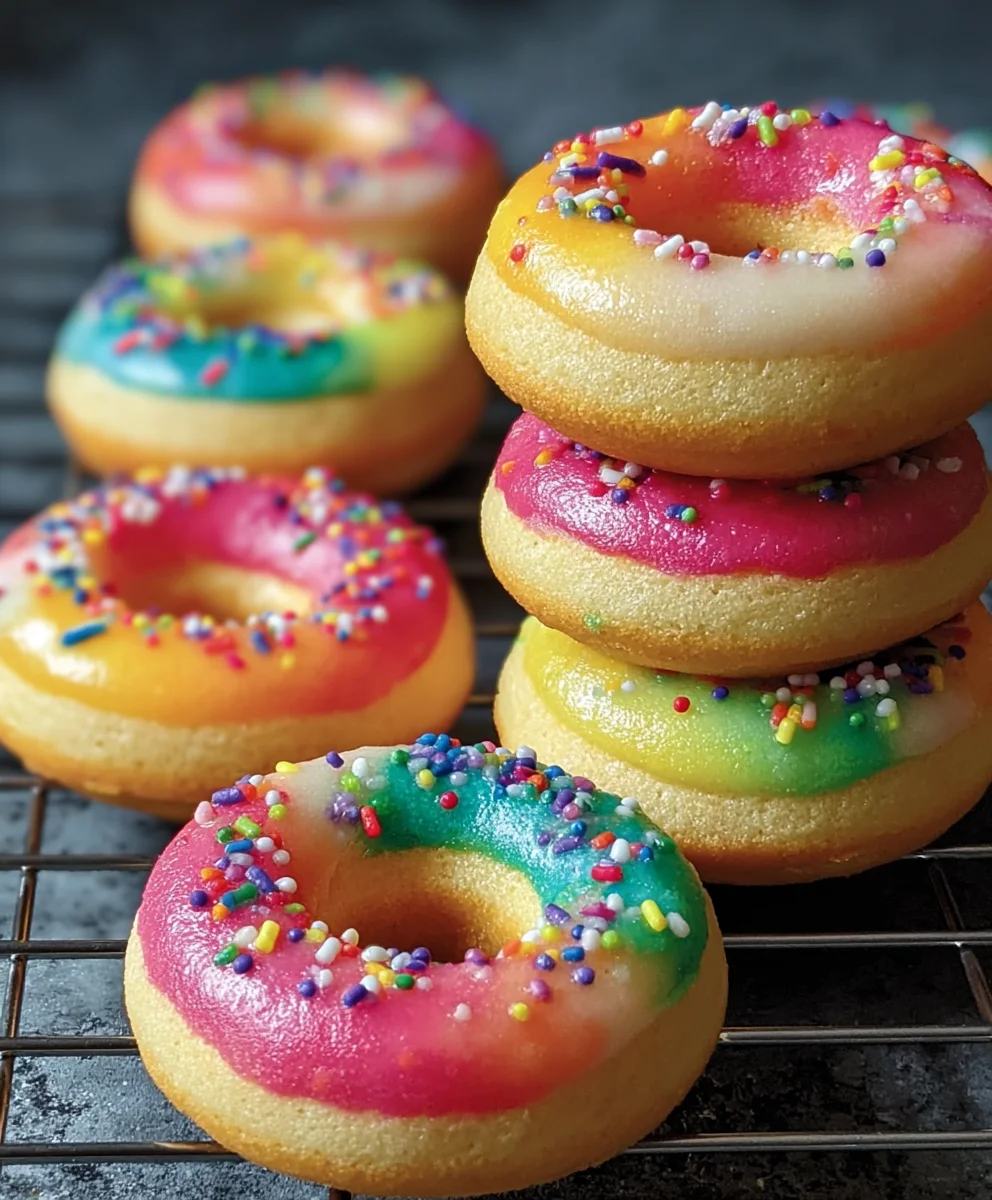
Mini Rainbow Vanilla Bean Donuts are not just a delightful treat; they are a miniature explosion of joy and flavor that captivates both young and old. What is it about these perfectly proportioned, vibrant delights that makes them so universally loved? Perhaps it’s the sheer visual appeal – the playful swirl of colors reminiscent of a happy childhood, or the tender, fluffy crum extractb infused with the delicate, aromatic essence of real vanilla bean. These aren’t your average donuts; they are crafted with care, promising a taste experience that is both comforting and exciting. The star, of course, is the authentic vanilla bean, lending a depth of flavor far beyond any artificial substitute. Each bite is a testament to the magic that happens when simple ingredients are transformed into something truly spectacular, making these Mini Rainbow Vanilla Bean Donuts an instant favorite for any occasion, from a cheerful breakfast to a whimsical dessert.
Ingredients:
- 2 cups all-purpose flour, sifted
- ¾ cup granulated sugar
- 2 teaspoons baking powder
- ½ teaspoon salt
- ¾ cup buttermilk
- 2 large eggs, lightly beaten
- 2 tablespoons butter, melted and slightly cooled
- 1 teaspoon vanilla extract
- Seeds scraped from 1 vanilla bean
- Gel food coloring (red, orange, yellow, green, blue, purple)
- 1 cup confectioners’ sugar, sifted
- 1 tablespoon whole milk or heavy cream (plus a tiny bit more if needed to adjust glaze consistency)
- ½ teaspoon vanilla extract
- Food coloring (optional, for glaze if you want to add more color variations)
- Rainbow sprinkles (optional, for decorating the donuts)
Making the Mini Rainbow Vanilla Bean Donuts
Preparing the Donut Batter
This recipe is designed for a standard mini donut maker. If you don’t have one, you can adapt this batter for baking in mini donut pans, although the texture will be slightly different.
First things first, let’s get our dry ingredients organized. In a medium-sized mixing bowl, whisk together the sifted all-purpose flour, granulated sugar, baking powder, and salt. Sifting the flour is key here; it helps to aerate it and ensures there are no lumps, leading to a lighter donut texture. Whisking these dry ingredients thoroughly guarantees that the leavening agent (baking powder) and salt are evenly distributed, which is crucial for consistent rise and flavor.
Now, let’s move to the wet ingredients. In a separate, larger bowl, whisk together the buttermilk, lightly beaten large eggs, melted and slightly cooled butter, the teaspoon of vanilla extract, and the precious vanilla bean seeds. Make sure your melted butter isn’t too hot, as you don’t want to cook the eggs. Incorporating the vanilla bean seeds directly into the wet ingredients will distribute those lovely little flecks and that intense vanilla flavor throughout the donuts.
Gradually add the dry ingredients to the wet ingredients, mixing until just combined. It’s very important not to overmix the batter. Overmixing can develop the gluten in the flour too much, resulting in tough donuts. A few small lumps are perfectly fine! We’re aiming for a smooth, but not overly worked, batter.
Creating the Rainbow Effect
This is where the fun begin extracts! Divide the donut batter evenly into six small bowls. You’ll want to add just a tiny amount of gel food coloring to each bowl – we’re talking a few drops at most to start. Gently fold the color into each portion of batter until it’s uniformly colored. We’ll be creating layers of color, so a little goes a long way to achieve vibrant hues. You’ll need red, orange, yellow, green, blue, and purple. Gel food coloring is recommended because it’s concentrated and won’t add excess liquid to your batter, which could affect the texture.
Cooking the Mini Donuts
Preheat your mini donut maker according to the manufacturer’s instructions. This is a critical step for achieving perfectly cooked donuts. Once the maker is hot, it’s time to fill the molds. You can use a piping bag, a zip-top bag with the corner snipped off, or even a spoon for this.
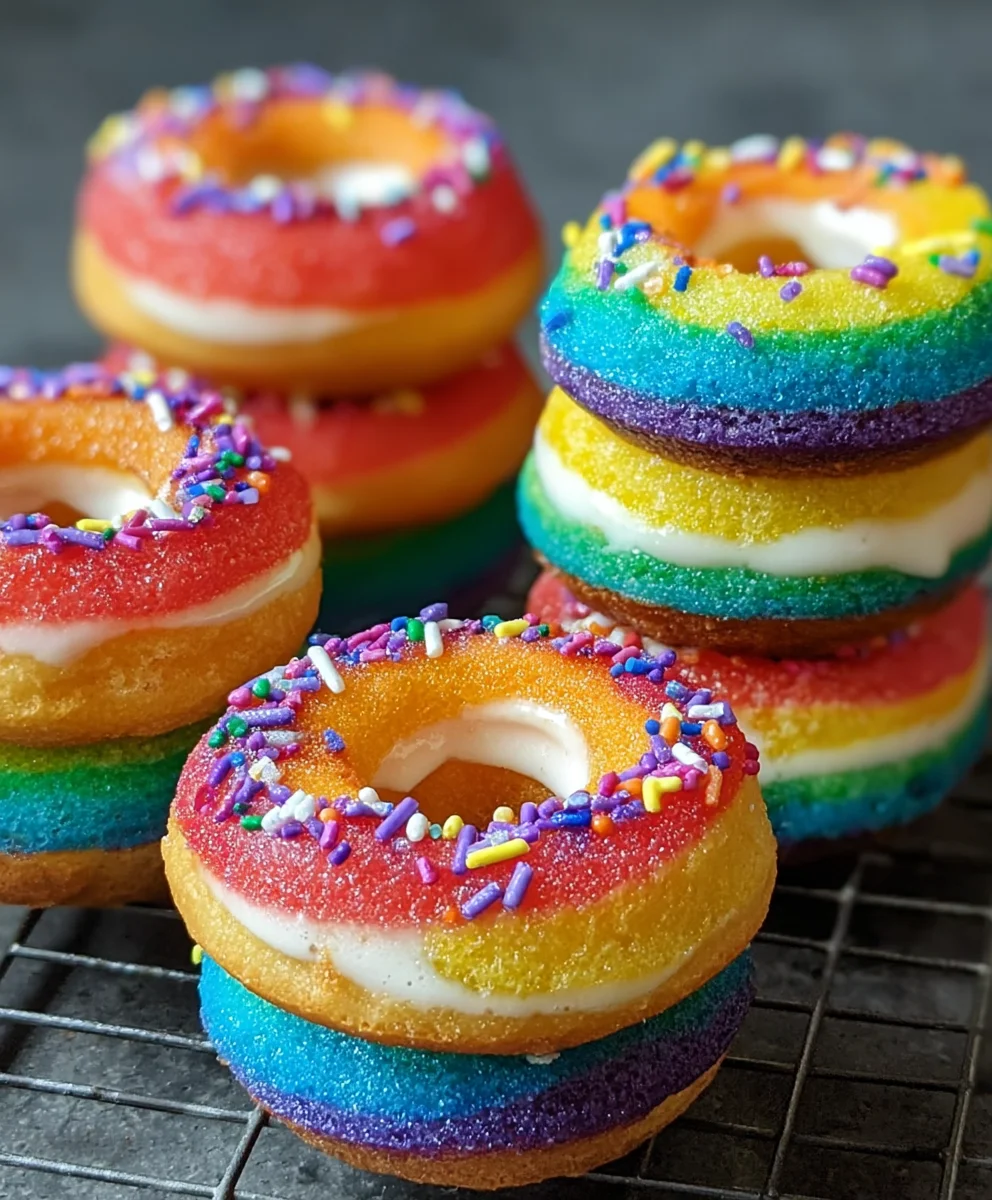
To create the rainbow effect in each donut, start by adding a small amount of the purple batter to the bottom of each donut cavity. Then, add a layer of blue batter, followed by green, yellow, orange, and finally red on top. Don’t fill the cavities completely; leave a little room for them to expand. Aim for about two-thirds to three-quarters full.
Close the lid of your donut maker and cook for about 3-5 minutes, or until the donuts are lightly golden and cooked through. The exact cooking time will vary depending on your specific donut maker. You can gently lift the lid to check on them – they should easily release from the non-stick surface. Carefully remove the cooked donuts and place them on a wire rack to cool completely before glazing. Repeat this process with the remaining batter, making sure to grease or spray your donut maker if it’s not heavily non-stick.
Glazing and Decorating
While the donuts are cooling, let’s whip up the simple glaze. In a medium bowl, whisk together the sifted confectioners’ sugar, the tablespoon of whole milk or heavy cream, and the ½ teaspoon of vanilla extract. Start with one tablespoon of liquid and whisk until smooth. If the glaze is too thick, add just a tiny bit more milk or cream, a teaspoon at a time, until you reach a drizzly consistency that will coat the donuts nicely. You want it thin enough to drip, but not so thin that it runs off completely. If you want to add additional colors to your glaze, you can divide it into smaller bowls and tint them with a bit more food coloring, or leave it white for a classic look.
Once the donuts have cooled completely, it’s time to glaze them. You can dip the top of each donut into the glaze, or use a spoon to drizzle it over. If you’re using multiple glaze colors, get creative! Place the glazed donuts back on the wire rack to allow the glaze to set.
For an extra touch of fun, while the glaze is still wet, sprinkle them with rainbow sprinkles. This is the perfect finishing touch for your Mini Rainbow Vanilla Bean Donuts, making them as visually appealing as they are delicious. These are best enjoyed fresh, within a day or two of making them.
Conclusion:
And there you have it – your guide to creating delightful Mini Rainbow Vanilla Bean Donuts! We’ve walked through each step to ensure your donuts are fluffy, flavorful, and visually stunning. The vibrant rainbow layers are sure to bring a smile to anyone’s face, making these perfect for celebrations, bake snon-alcoholic ales, or just a special treat to brighten your day. Don’t be afraid to get creative with your coloring and frosting! These little gems are incredibly versatile and always a hit.
For serving suggestions, these Mini Rainbow Vanilla Bean Donuts are fantastic on their own. However, they also pair wonderfully with a cold glass of milk, a hot cup of coffee, or even a scoop of vanilla ice cream for an extra decadent dessert. Consider dusting them with a little extra powdered sugar or serving them alongside fresh berries for a pop of color and freshness.
When it comes to variations, the possibilities are endless! You can experiment with different extracts in the batter, like almond or lemon, for a new flavor profile. For the frosting, try a simple vanilla glaze, a rich chocolate ganache, or even a cream cheese frosting. You can also play with the rainbow colors – perhaps a sunset theme or even a single vibrant color!
I truly hope you enjoy making and sharing these Mini Rainbow Vanilla Bean Donuts as much as I do. The joy of baking, especially with such fun and colorful results, is truly rewarding. So, gather your ingredients, put on some music, and have a fantastic time in the kitchen!
Frequently Asked Questions:
How can I get the rainbow colors to be really vibrant?
To achieve vibrant colors, use good quality gel food coloring rather than liquid. Gel colors are more concentrated, meaning you’ll need less to get an intense hue. Divide your batter into bowls and add the coloring to each, starting with a small amount and adding more until you reach your desired shade.
Can I make these donuts ahead of time?
Yes, you can! The unfrosted donuts can be stored in an airtight container at room temperature for up to two days. It’s best to frost them on the day you plan to serve them for the freshest taste and appearance. The frosting can also be made ahead and stored in the refrigerator, then brought to room temperature and whisked before frosting the donuts.
What is the best way to store leftover Mini Rainbow Vanilla Bean Donuts?
For best results, store any leftover Mini Rainbow Vanilla Bean Donuts in an airtight container at room temperature. This will help prevent them from drying out. They are typically best enjoyed within 2-3 days. If you need to store them for longer, you can refrigerate them, but be aware that this can sometimes affect the texture slightly.
Mini Rainbow Vanilla Bean Donuts-Sweet Fun!
Delightful mini donuts with layers of vibrant rainbow colors and infused with real vanilla bean for a sweet and fun treat.
Ingredients
-
2 cups all-purpose flour, sifted
-
¾ cup granulated sugar
-
2 teaspoons baking powder
-
½ teaspoon salt
-
¾ cup buttermilk
-
2 large eggs, lightly beaten
-
2 tablespoons butter, melted
-
1 teaspoon vanilla extract
-
Seeds scraped from 1 vanilla bean
-
Gel food coloring (red, orange, yellow, green, blue, purple)
-
1 cup confectioners’ sugar, sifted
-
1 tablespoon whole milk or heavy cream
-
½ teaspoon vanilla extract
-
Rainbow sprinkles (optional)
Instructions
-
Step 1
In a medium bowl, whisk together sifted flour, sugar, baking powder, and salt. In a separate large bowl, whisk together buttermilk, eggs, melted butter, vanilla extract, and vanilla bean seeds. Gradually add dry ingredients to wet ingredients, mixing until just combined. Do not overmix. -
Step 2
Divide the batter evenly into six small bowls. Add a few drops of gel food coloring (red, orange, yellow, green, blue, purple) to each bowl and gently fold until uniformly colored. Aim for vibrant hues. -
Step 3
Preheat your mini donut maker. Fill each cavity with layers of batter, starting with purple, then blue, green, yellow, orange, and red. Fill about two-thirds to three-quarters full. -
Step 4
Cook in the donut maker for 3-5 minutes, or until lightly golden and cooked through. Carefully remove donuts and place on a wire rack to cool completely. -
Step 5
While donuts cool, prepare the glaze. Whisk together sifted confectioners’ sugar, milk or cream, and ½ teaspoon vanilla extract until smooth and drizzly. Adjust consistency with more liquid if needed. -
Step 6
Once donuts are completely cool, dip the tops into the glaze or drizzle over. Allow the glaze to set. Optionally, sprinkle with rainbow sprinkles while the glaze is wet.
Important Information
Nutrition Facts (Per Serving)
It is important to consider this information as approximate and not to use it as definitive health advice.
Allergy Information
Please check ingredients for potential allergens and consult a health professional if in doubt.